
 Intelli Docs
Custom Fields
Store details such as booking IDs, plan tiers, and birthdays on contacts, then use them in messages.
Every contact already has a name, email, and phone. Custom fields let you store anything else you care about; and then use it anywhere. Manage them at Dashboard → Audiences → Contacts → Custom Fields.
When to use one
A few real examples:
- A restaurant tracking booking_date and party_size.
- A SaaS tracking plan_tier and renewal_date.
- A store tracking last_order_id and preferred_size.
- Anyone tracking birthday, city, or language.
Managing custom fields
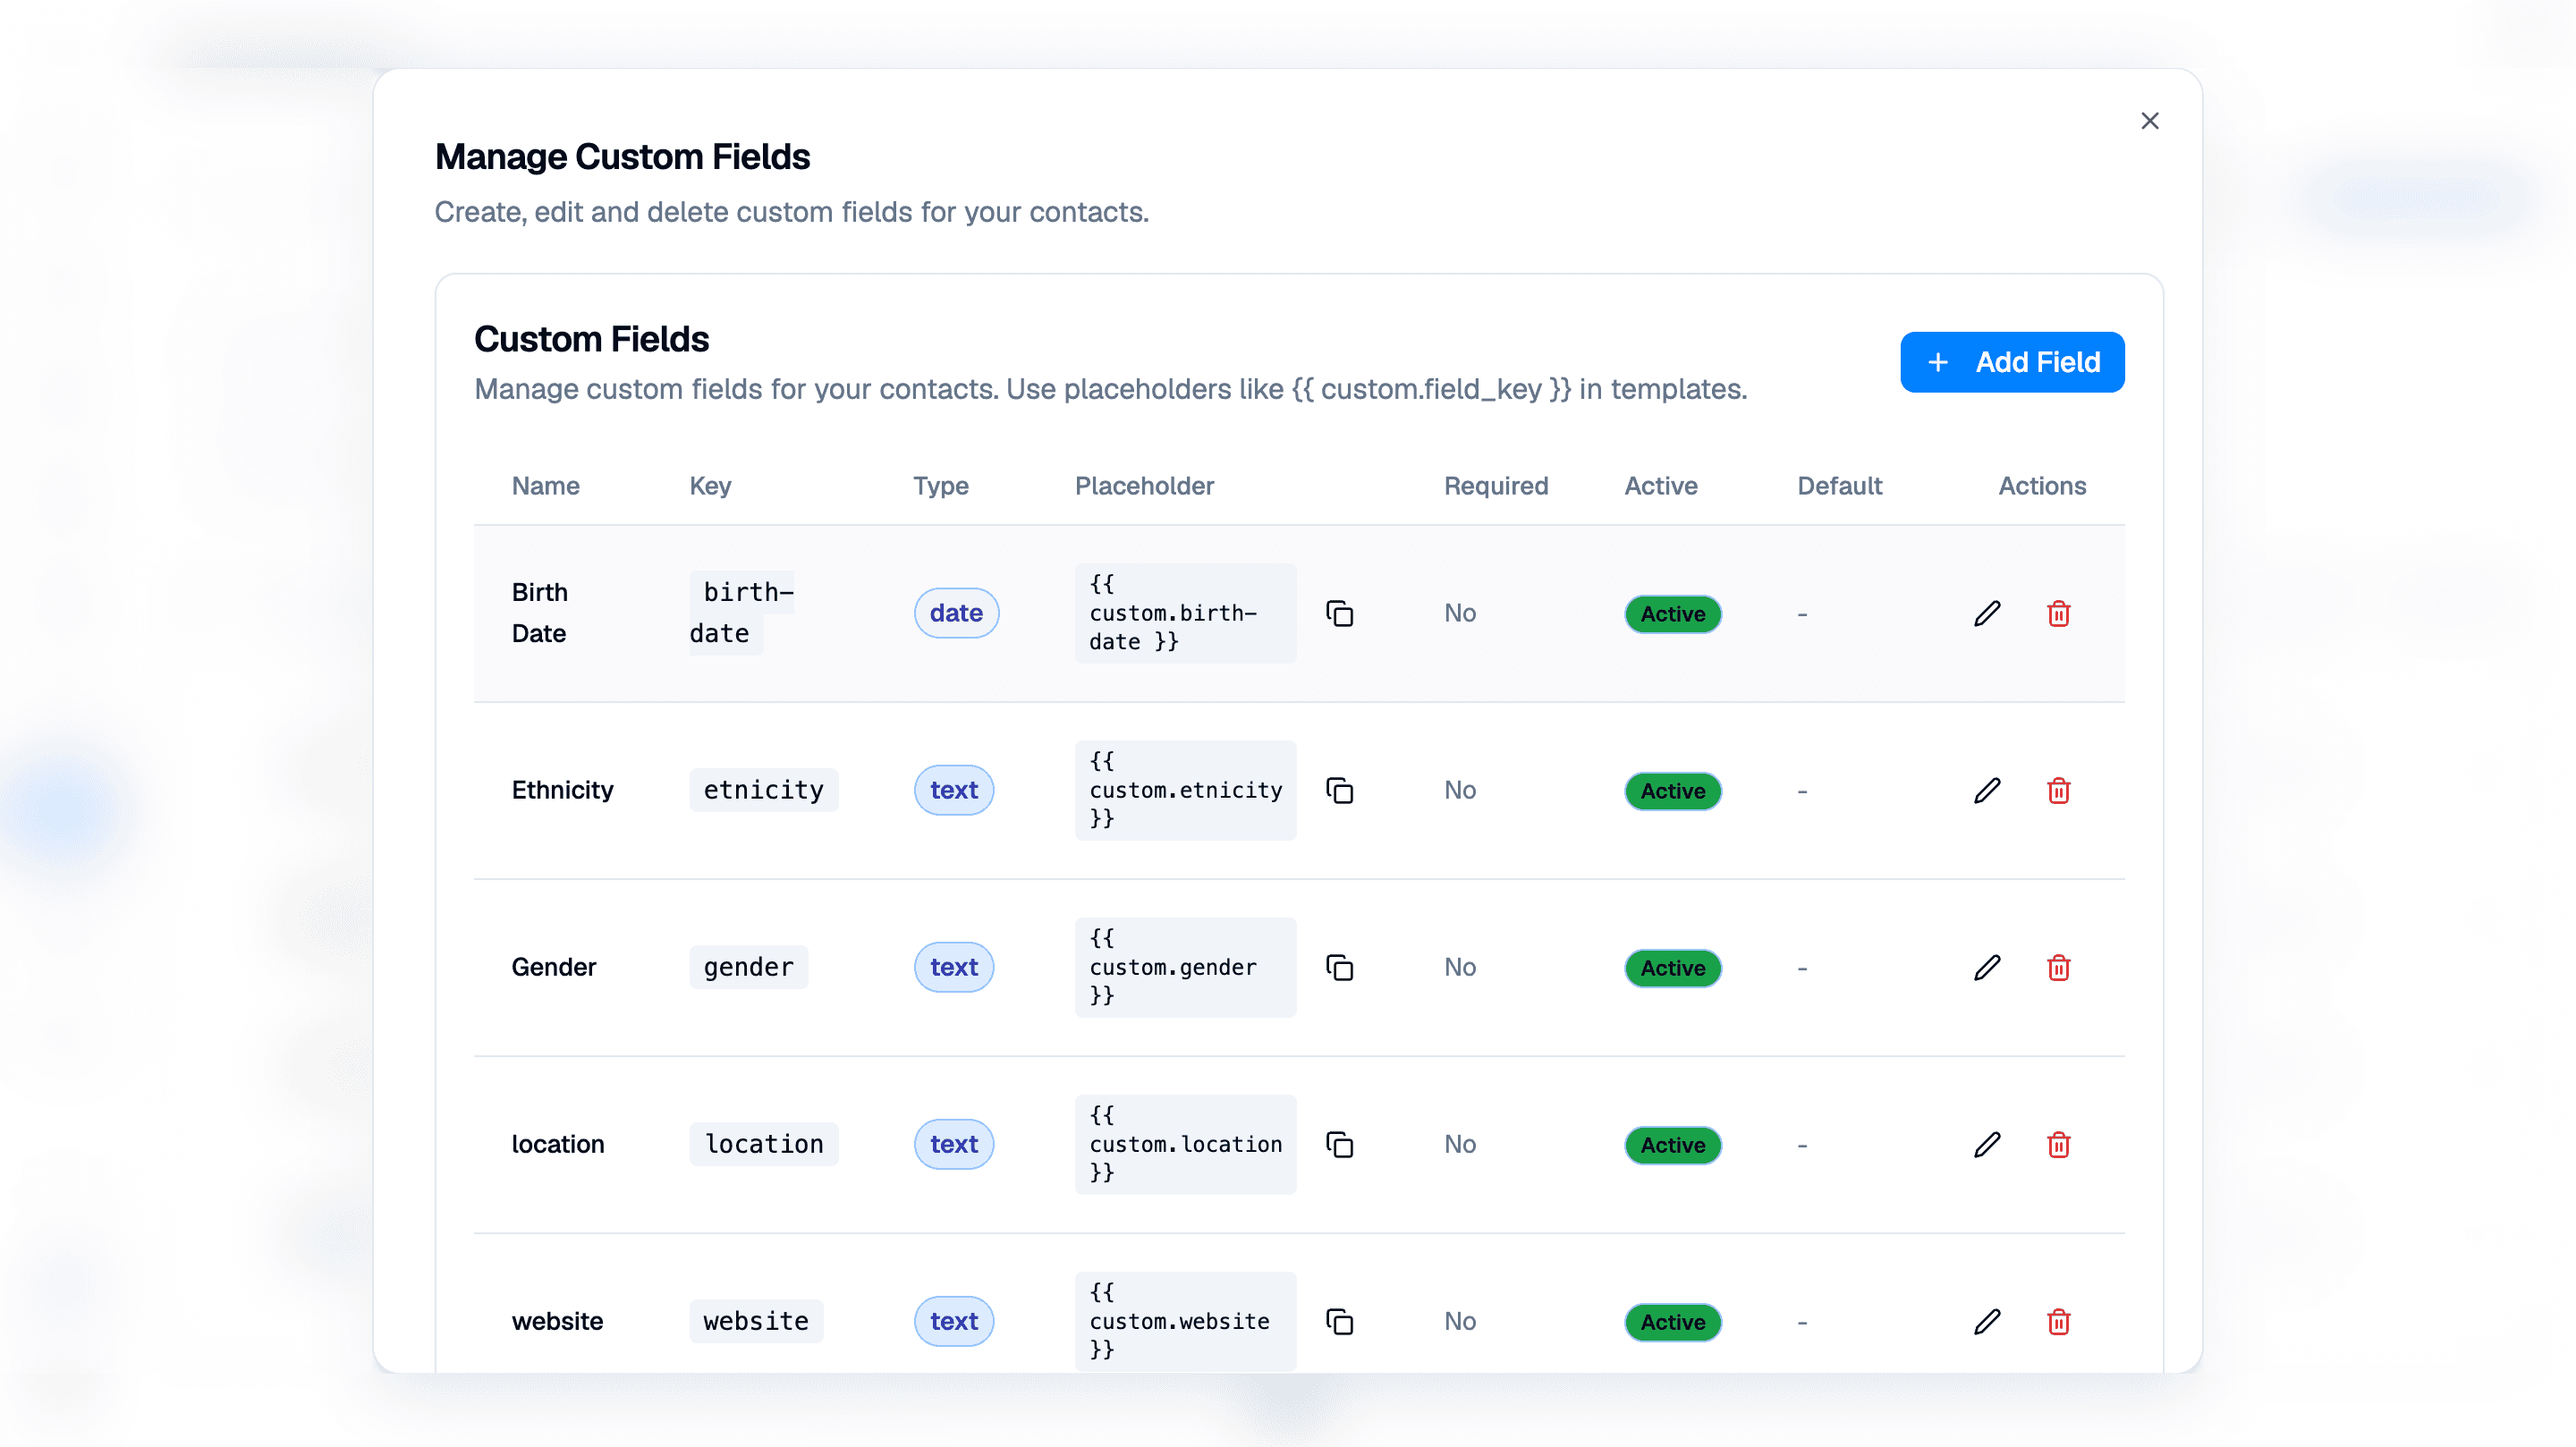
Click Custom Fields above the Contacts table to open Manage Custom Fields. Each row shows the field's Name, Key, Type, Placeholder, Required, Active, and Default settings.
- Click Add Field to create a field.
- Use the copy icon beside a Placeholder to copy its template syntax,
such as
{{ custom.field_key }}. - Use the pencil icon under Actions to edit a field.
- Use the trash icon to delete a field. Check where it is used before deleting it.
Creating a custom field
- Go to Audiences → Contacts → Custom Fields and click Add Field.
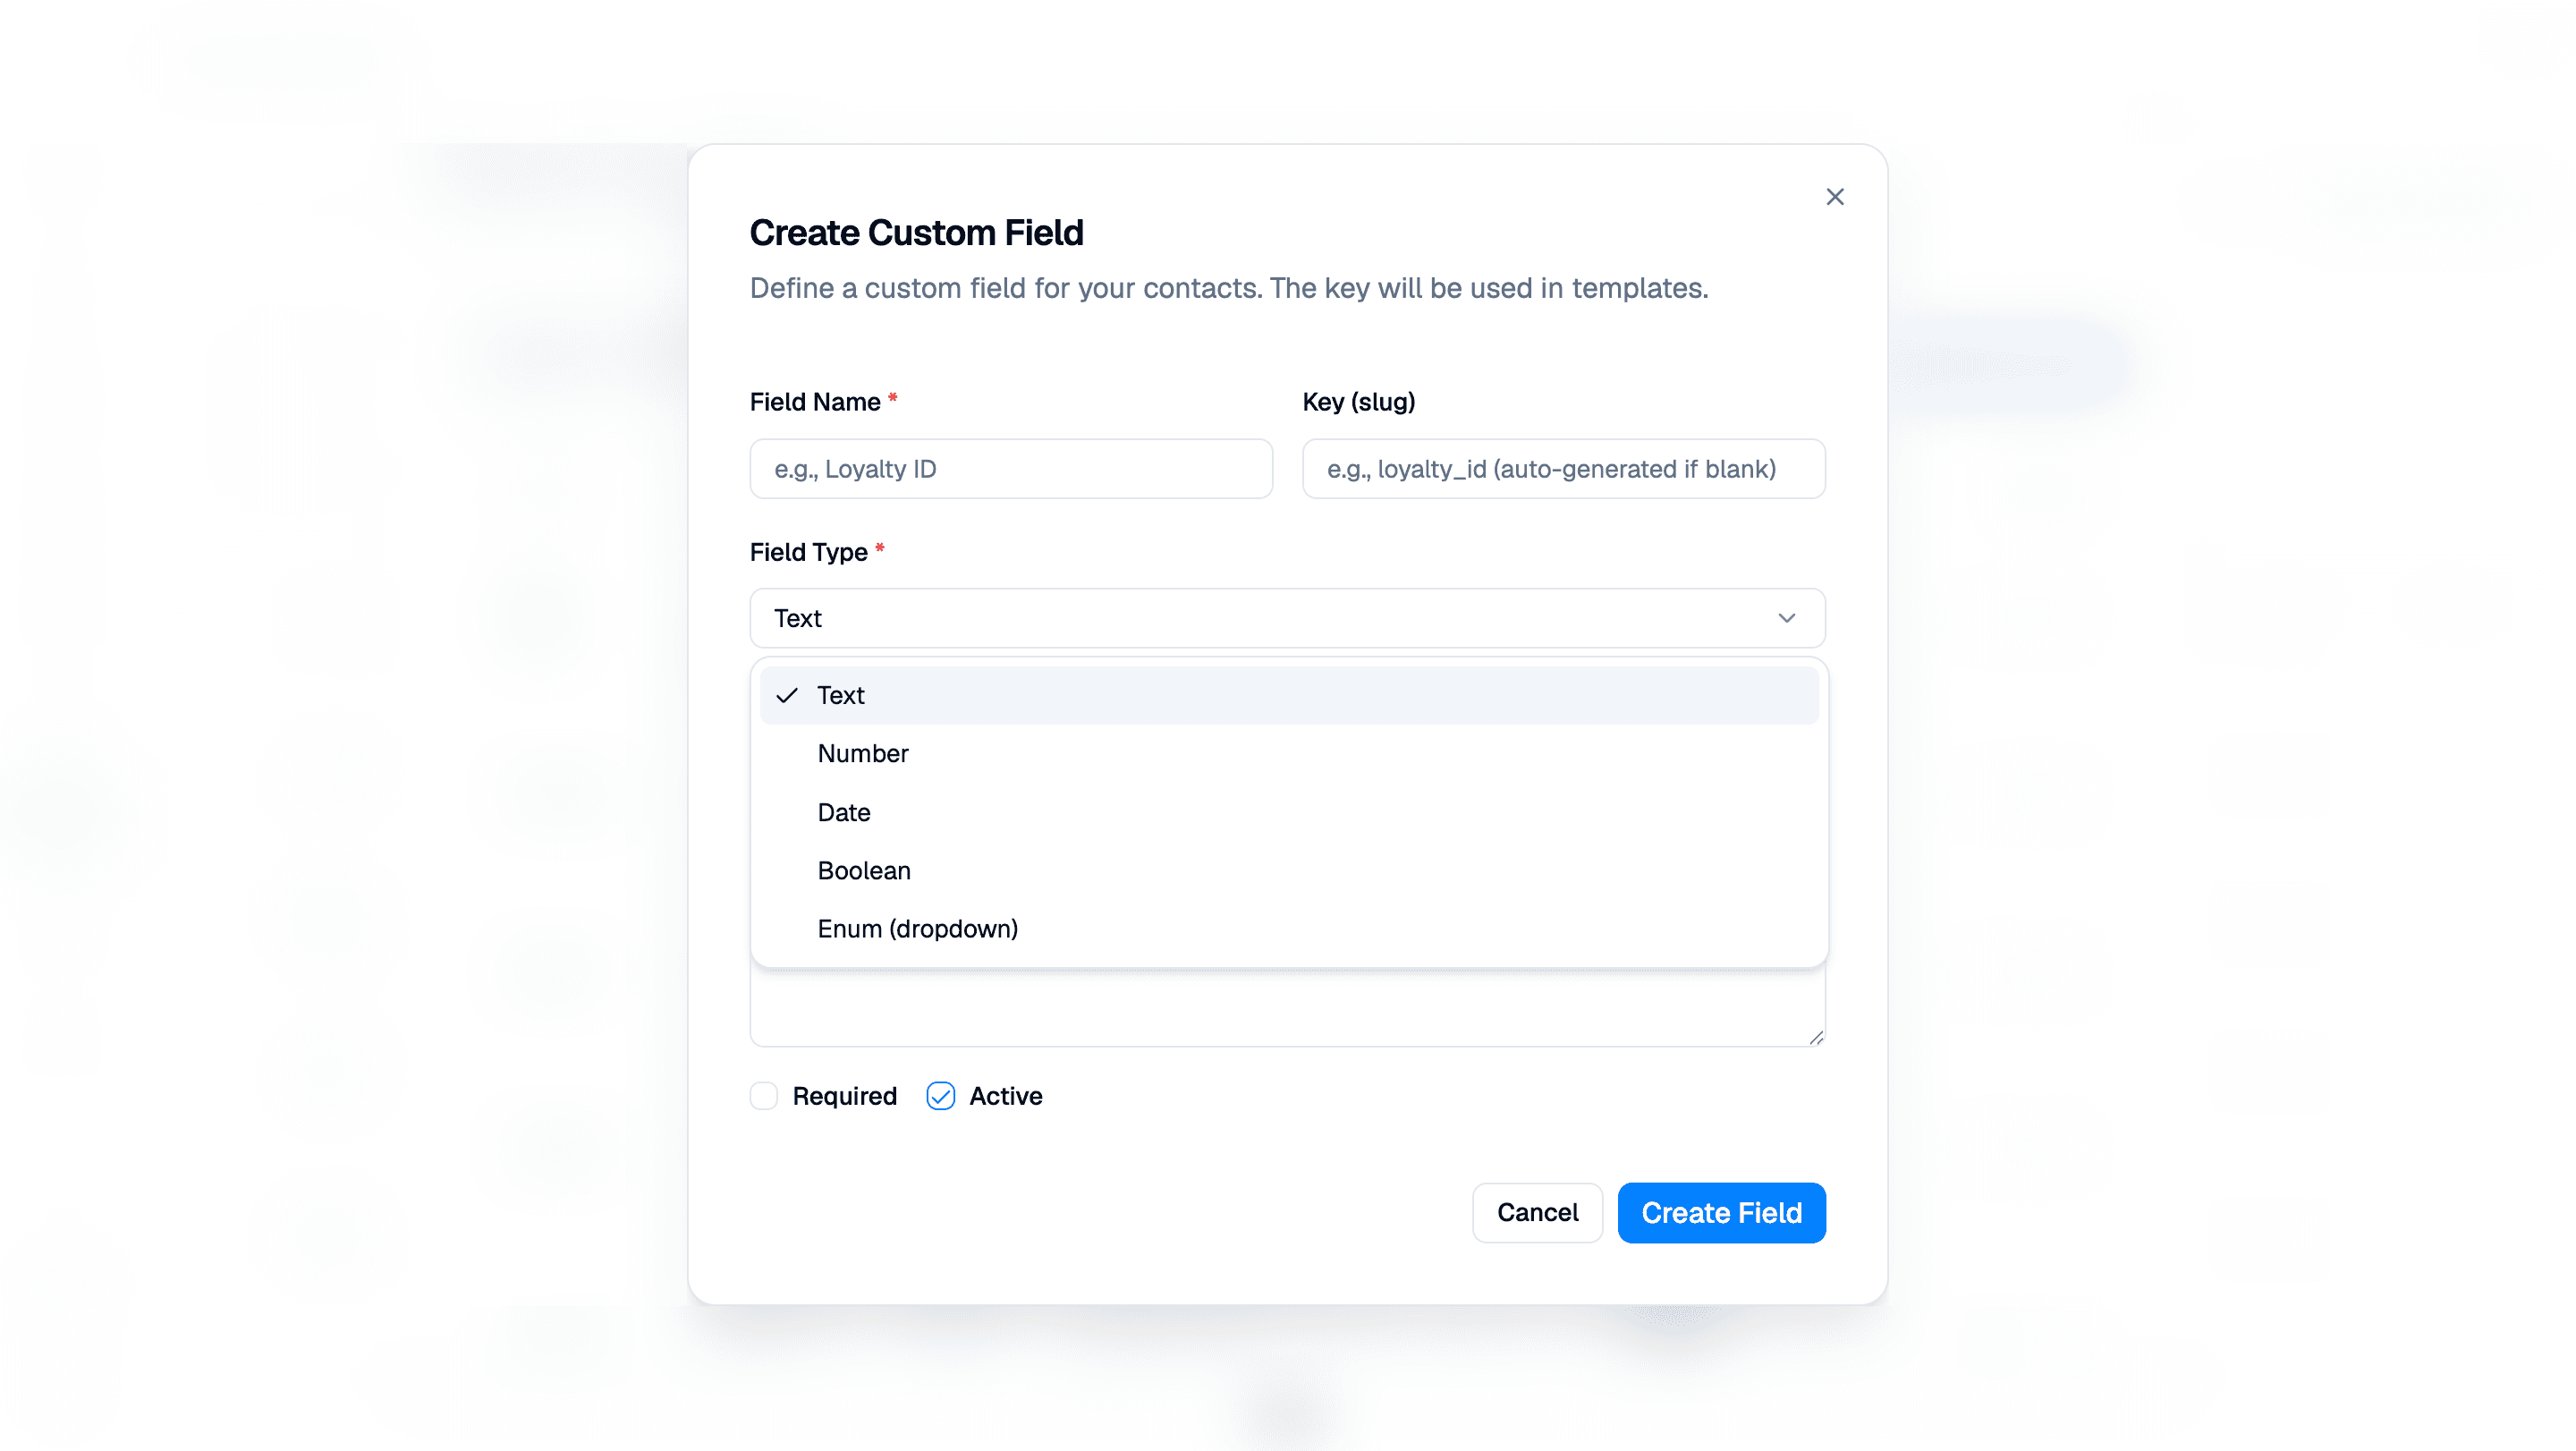
- Enter a Field Name (e.g. Booking Date). Enter a Key (slug),
such as
booking_date, or leave it blank to generate one automatically. - Pick a Field Type:
- Text: anything (a note, a code).
- Number: for amounts, counts, sizes.
- Date: for birthdays, expiry, appointments.
- Boolean: for true/false values.
- Enum (dropdown): when you want to limit to a fixed list (e.g. plan: free / pro / enterprise).
- Optionally mark it Required if every contact must have it, and review the Active checkbox, which is selected by default.
- Click Create Field.
Filling in custom fields
Three places this happens:
- On a contact page: edit the contact and fill in the field directly.
- During CSV import: map a CSV column to your custom field on the mapping step.
- In a chatbot flow: a question or user-input node can save the customer's answer to a custom field.
Using custom fields in messages
In a template, you write variables like {{1}}. When you build a campaign,
you map each variable to a value. Custom fields show up in that dropdown as
custom:booking_date.
Template body:
"Hi {{1}}, your table for {{2}} is confirmed for {{3}}."

Mapping:
{{1}} → fullname
{{2}} → custom:party_size
{{3}} → custom:booking_date
Using custom fields in segments
Segments can also filter by custom field. For example: "plan_tier = enterprise AND renewal_date < 30 days" gives you a list of enterprise customers up for renewal.
Tips
- Keep keys short and lowercase.
order_idbeatsOrderID-2. - Add fields gradually. Start with what you need today; you can always add more.
- Renaming is easy. The key stays the same so templates keep working.
What's next
- Use them in messages → Templates
- Collect them automatically → Chatbots & Flows