
 Intelli Docs
Audiences
Manage your contacts, tags, segments, and CSV imports. the foundation of every campaign you send.
Your audience is everyone you can reach; the foundation of every campaign and broadcast. Find it in the sidebar at Dashboard → Audiences.
What lives here
- Contacts: every person we know about (phone, name, email, tags, history).
- Segments: smart groups that update themselves based on rules.
- Imports: CSV uploads, so you can bring in lists from outside Intelli.
On Contacts, use the search box to find a contact or Filter by Tags to narrow the list. Add Contact, Custom Fields, and Bulk Import are available above the table.
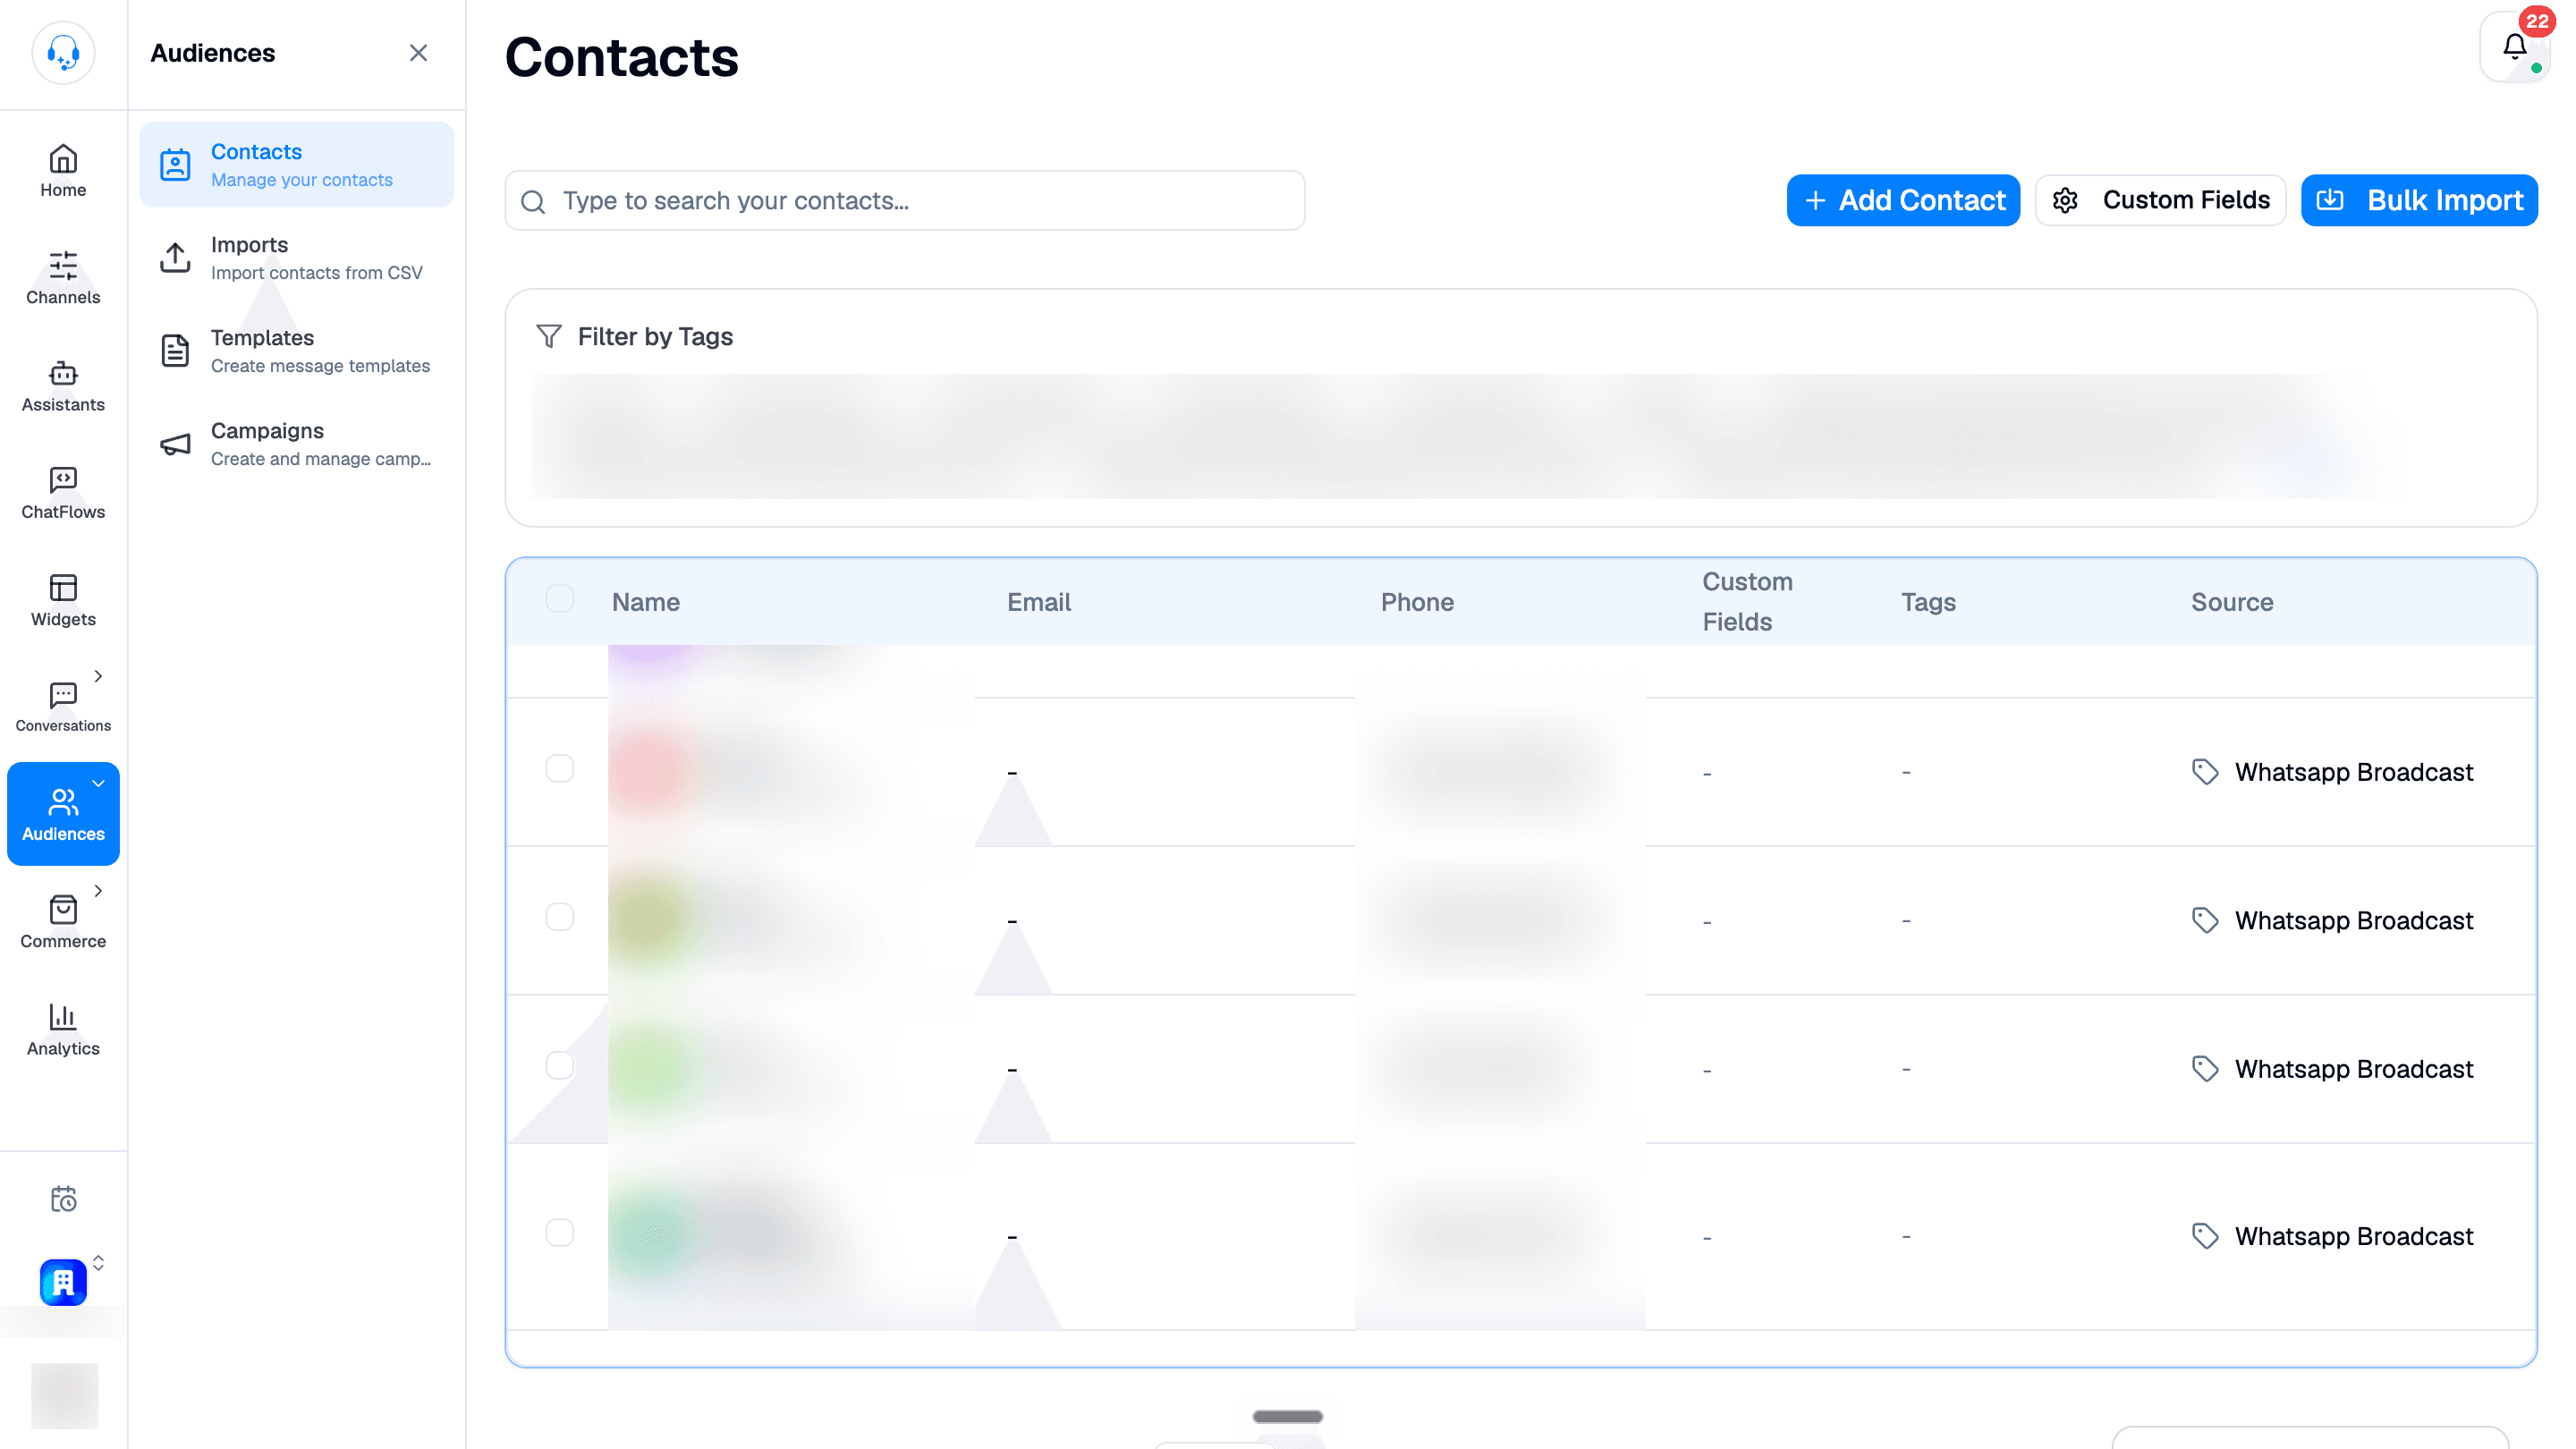
How contacts get into Intelli
You don't have to add everyone by hand. Contacts arrive three ways:
- Automatically: whenever someone messages you on WhatsApp, your website widget, Instagram, or Messenger, we add them as a contact.
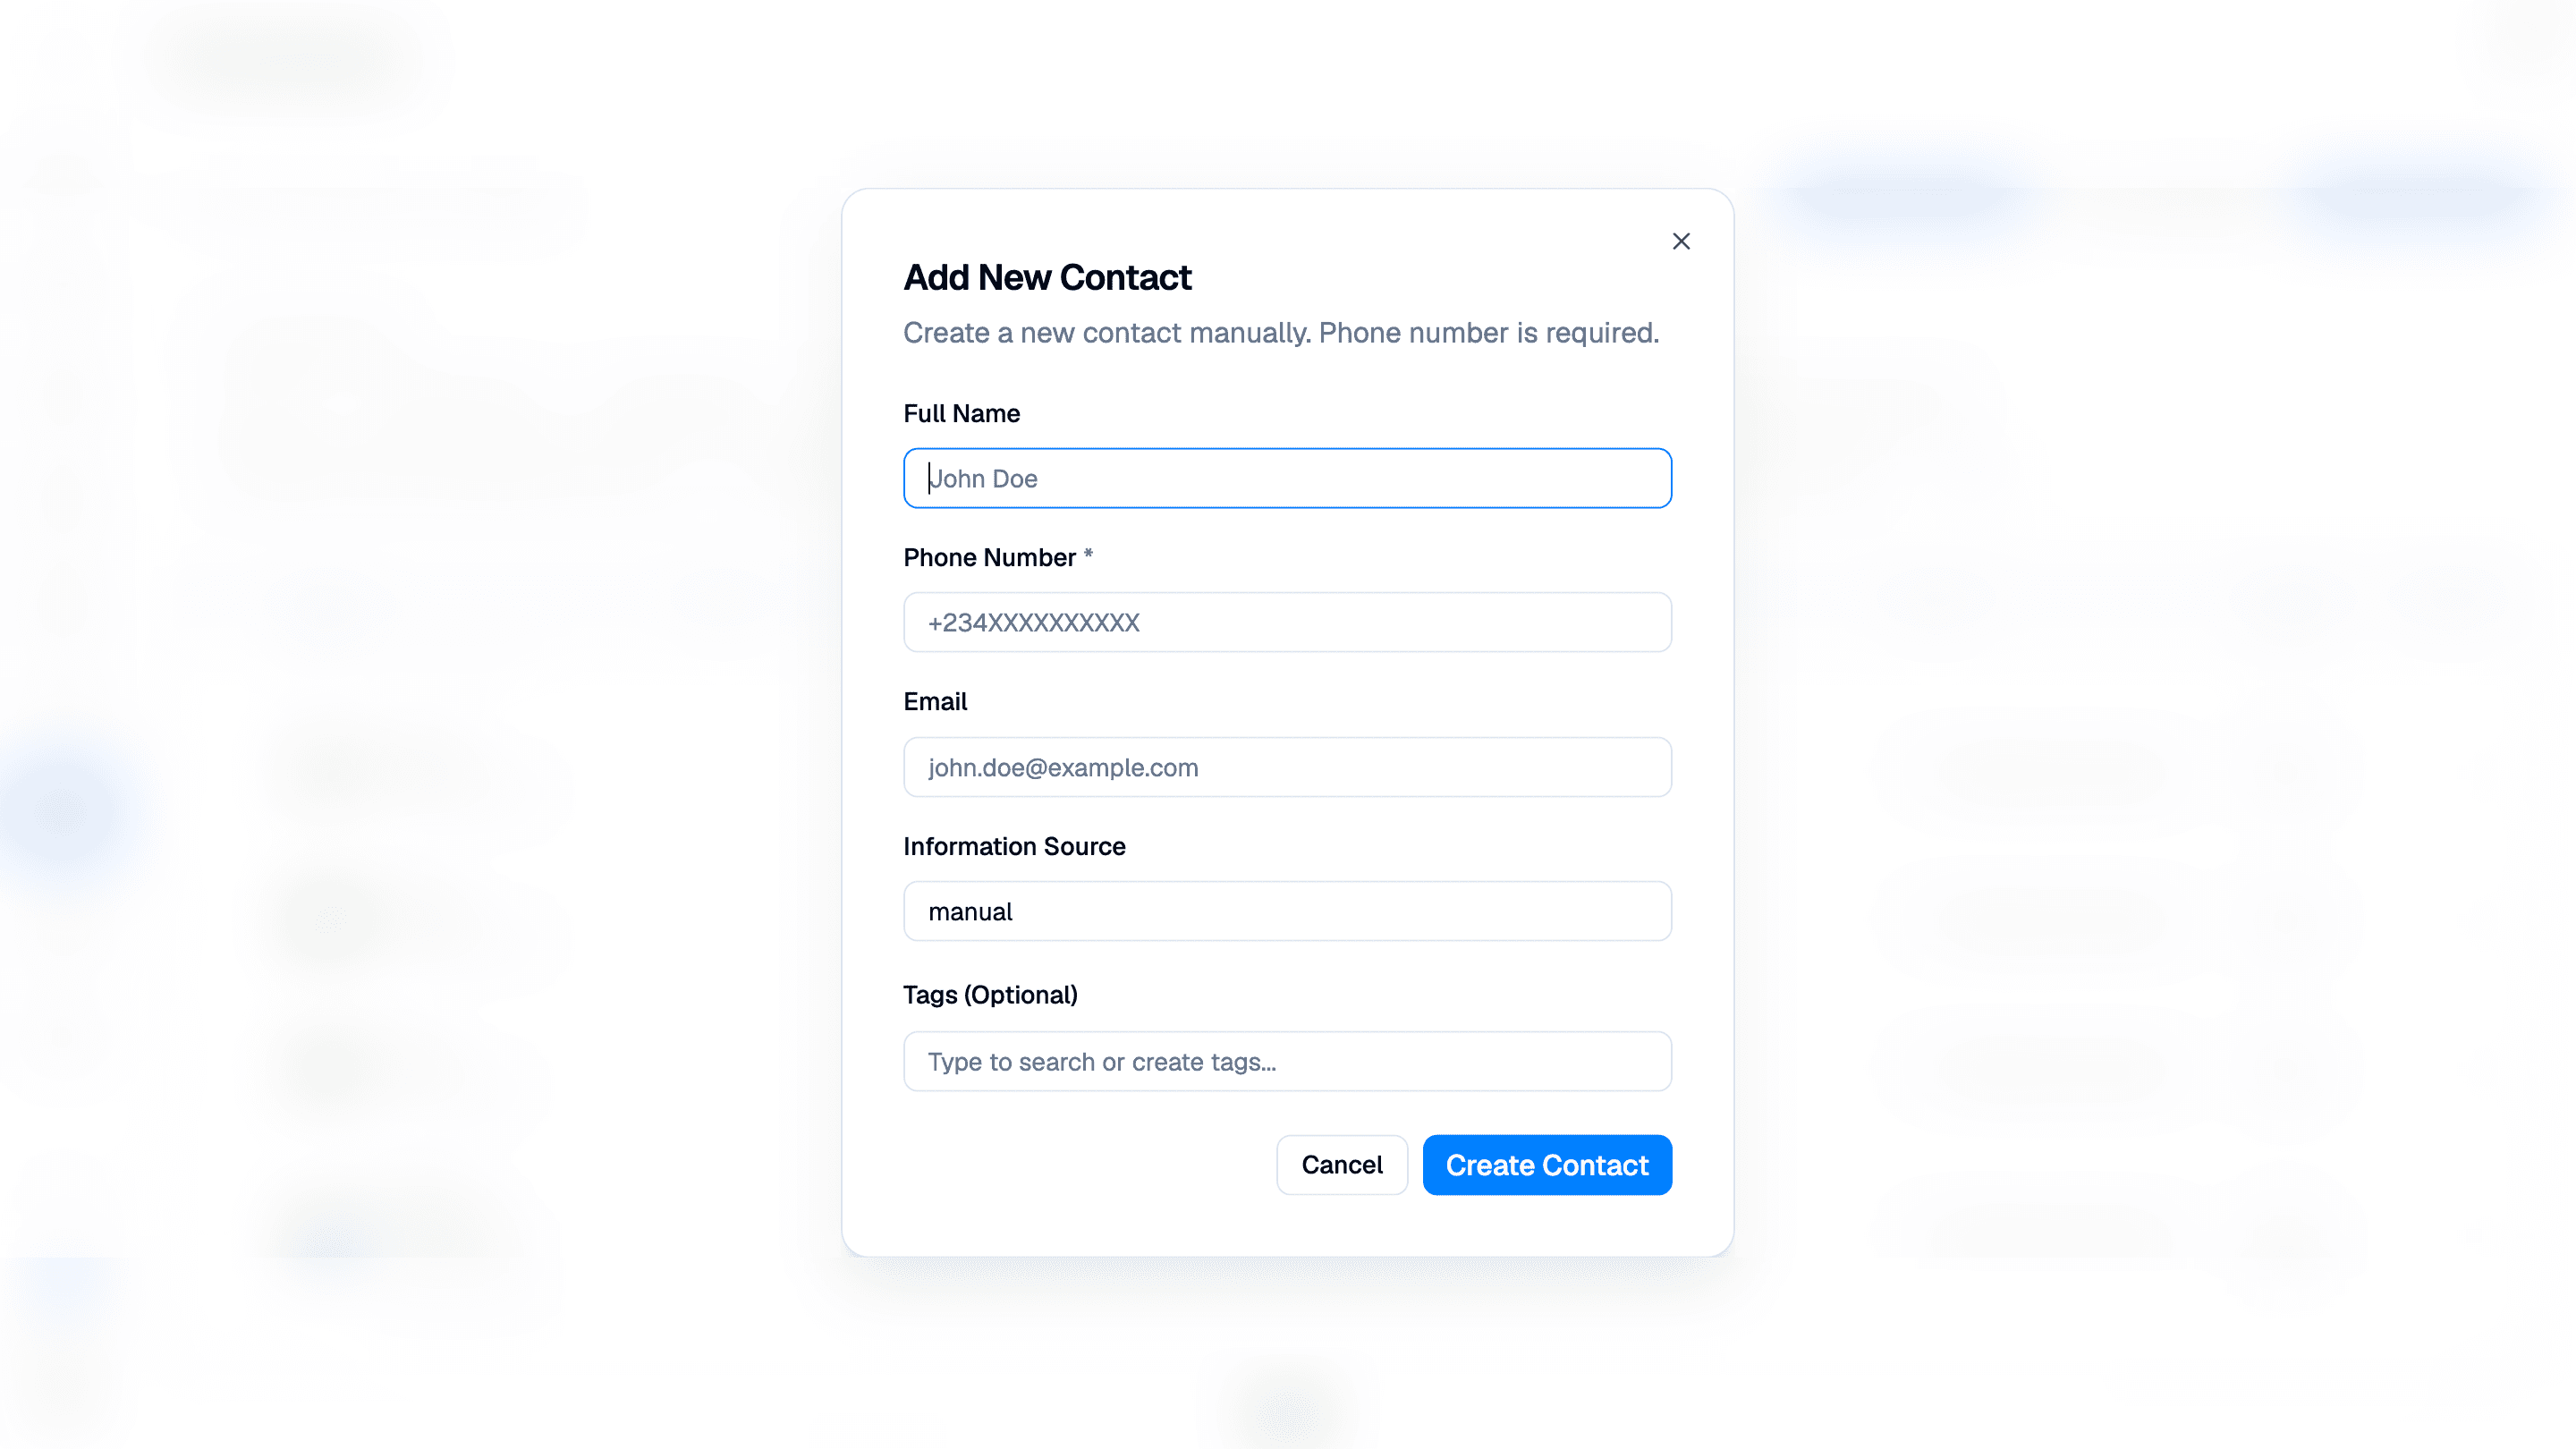
- Manually: click Add Contact in the Contacts page when you want to add one person at a time.
- CSV Import: for bulk lists (e.g. a webinar sign-up sheet, an existing customer database). See the Imports tab.
Adding a contact manually
- Open Audiences → Contacts and click Add Contact.
- Enter the Phone Number, including the country code. This field is required; you can also add a Full Name and Email.
- Review Information Source, which starts as
manual. - Optionally search for or create Tags.
- Click Create Contact.
Organizing with tags vs. segments
Tags and segments both group contacts, but they work differently:
- Tags: manual labels. You stick a tag on a contact (e.g.
vip,lagos,webinar-q4). It stays until you remove it. Use tags for things a human decides. - Segments: rules that update themselves. You define a rule once (e.g. "has tag VIP AND last active in 30 days") and Intelli keeps the list fresh automatically. Anyone who matches today is in; drop off tomorrow, you're out.
Importing a CSV: step by step
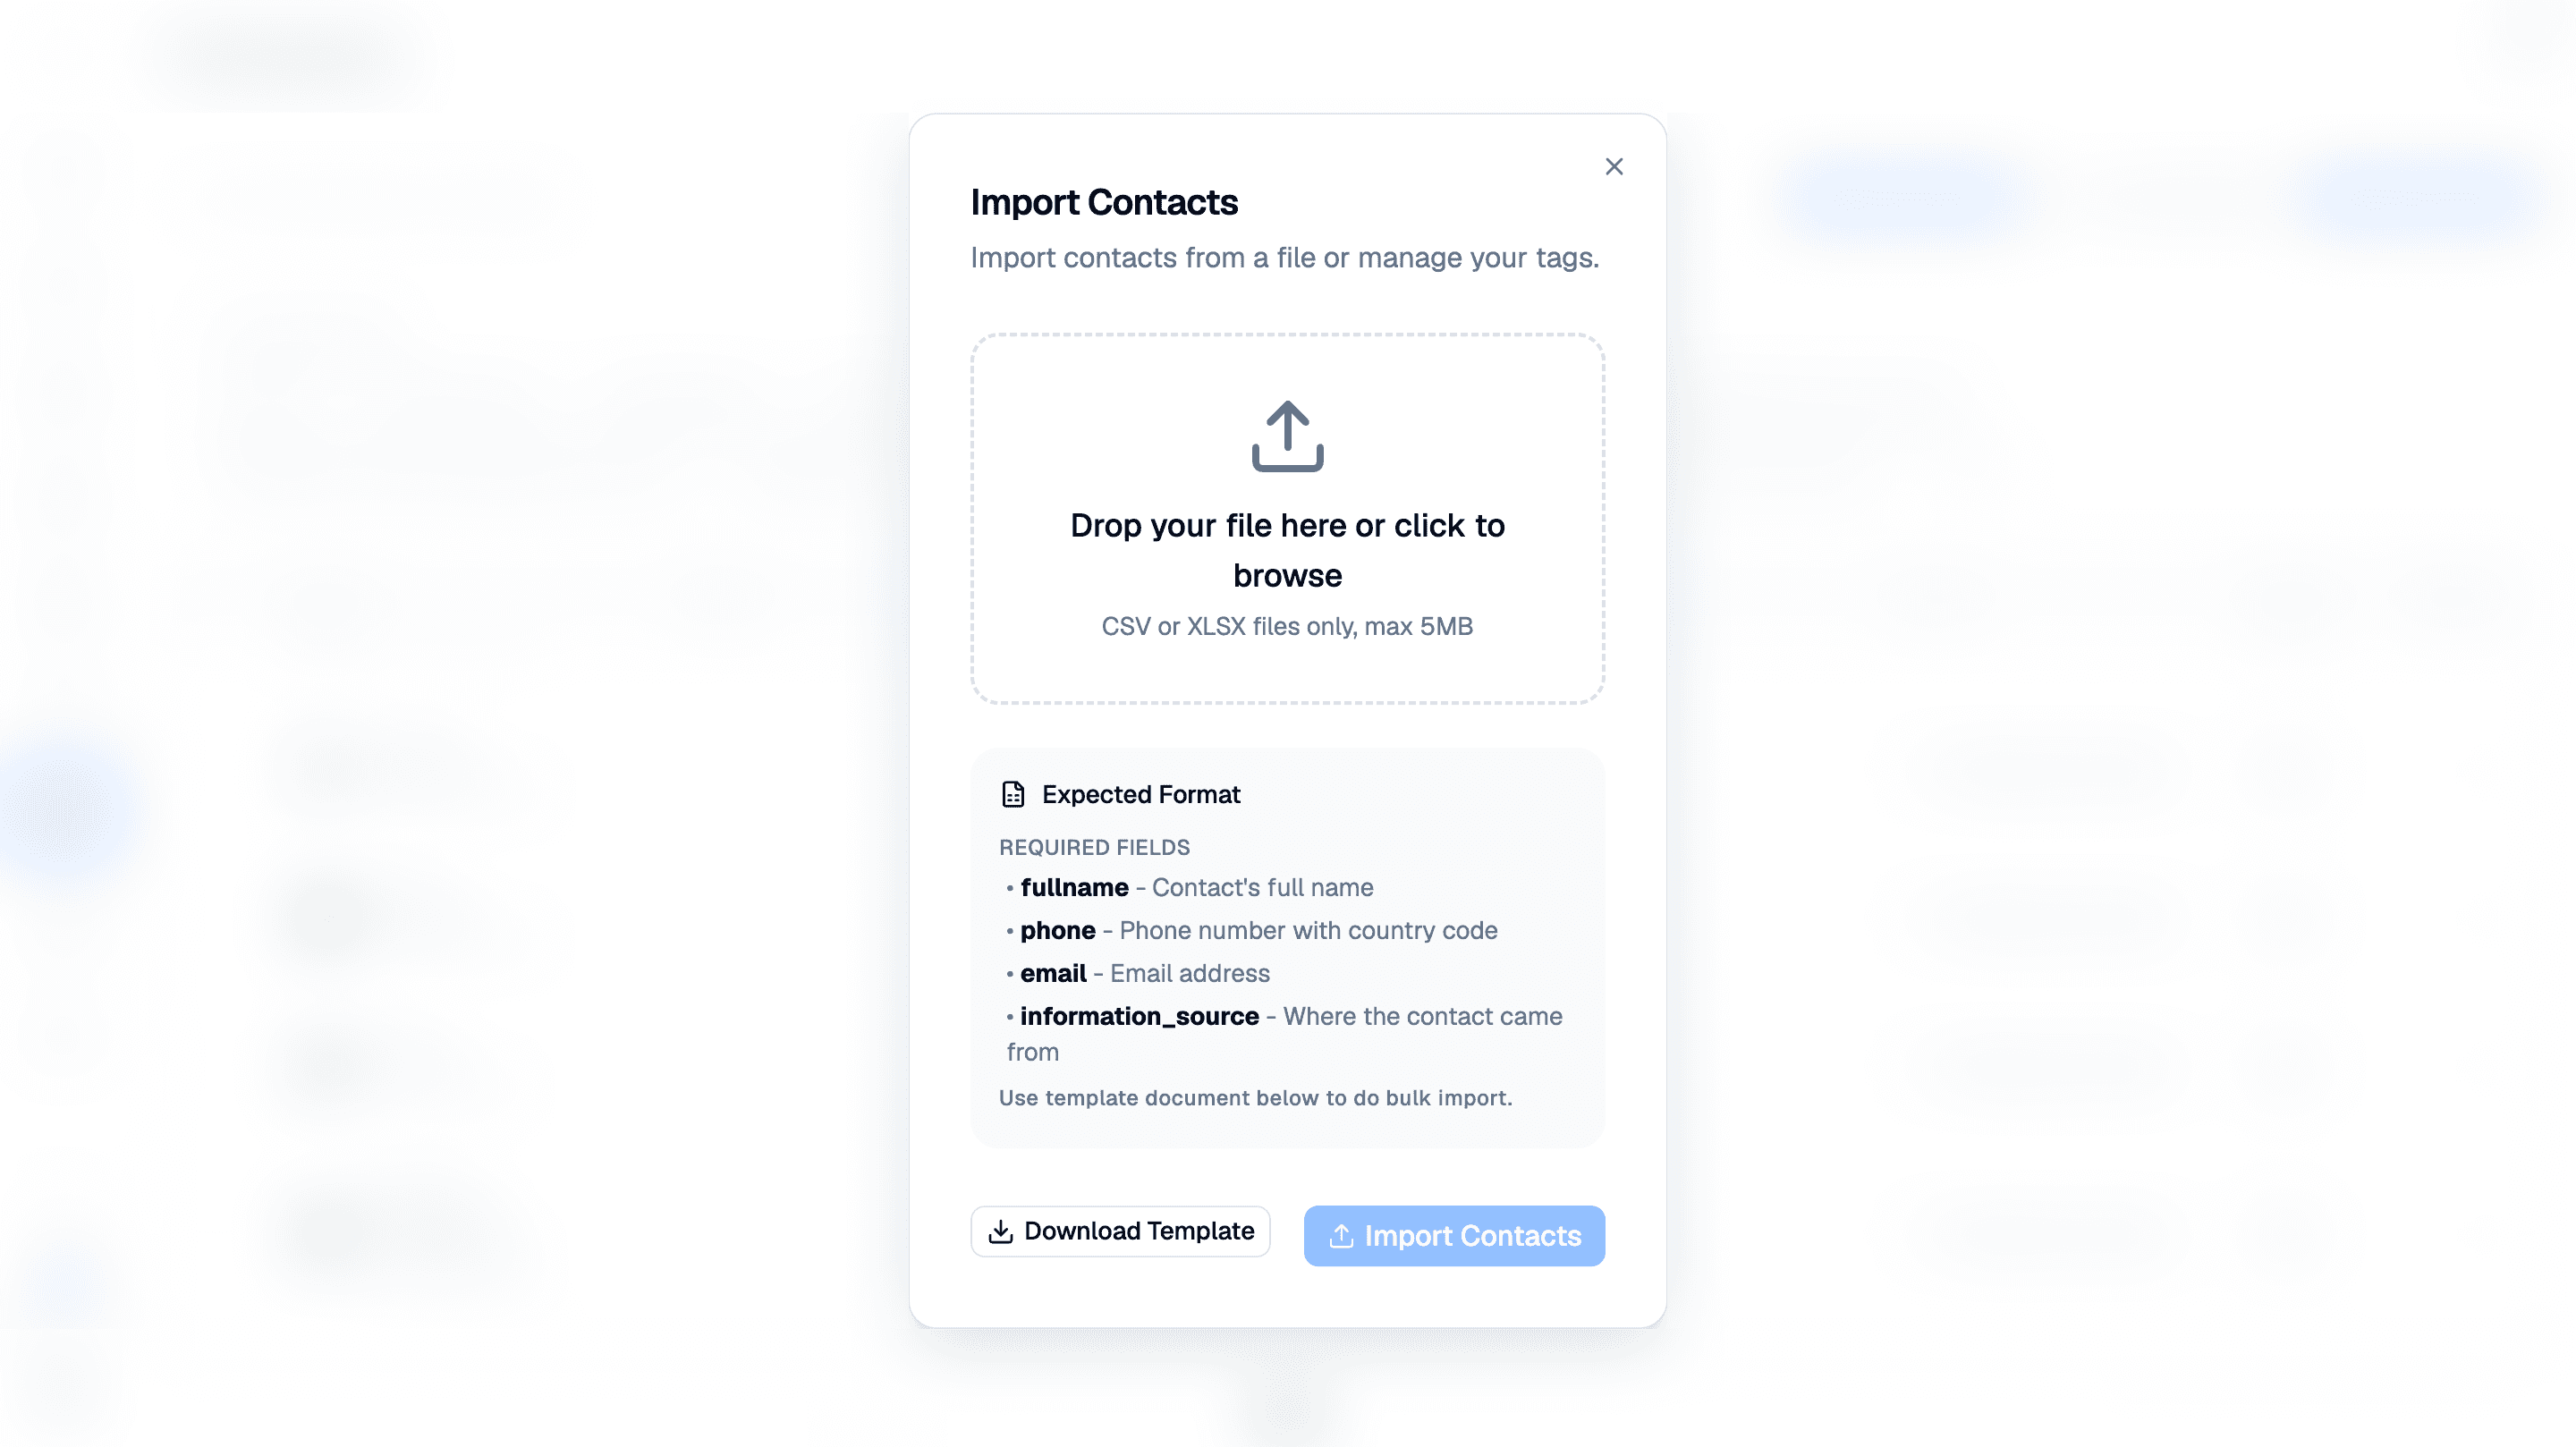
- Go to Audiences → Contacts and click Bulk Import.
- Click Download Template to start with the expected format. The
dialog lists
fullname,phone,email, andinformation_sourceas required fields. - Fill in the template, then drop the file into the upload area or click to browse. The dialog accepts CSV or XLSX files up to 5 MB.
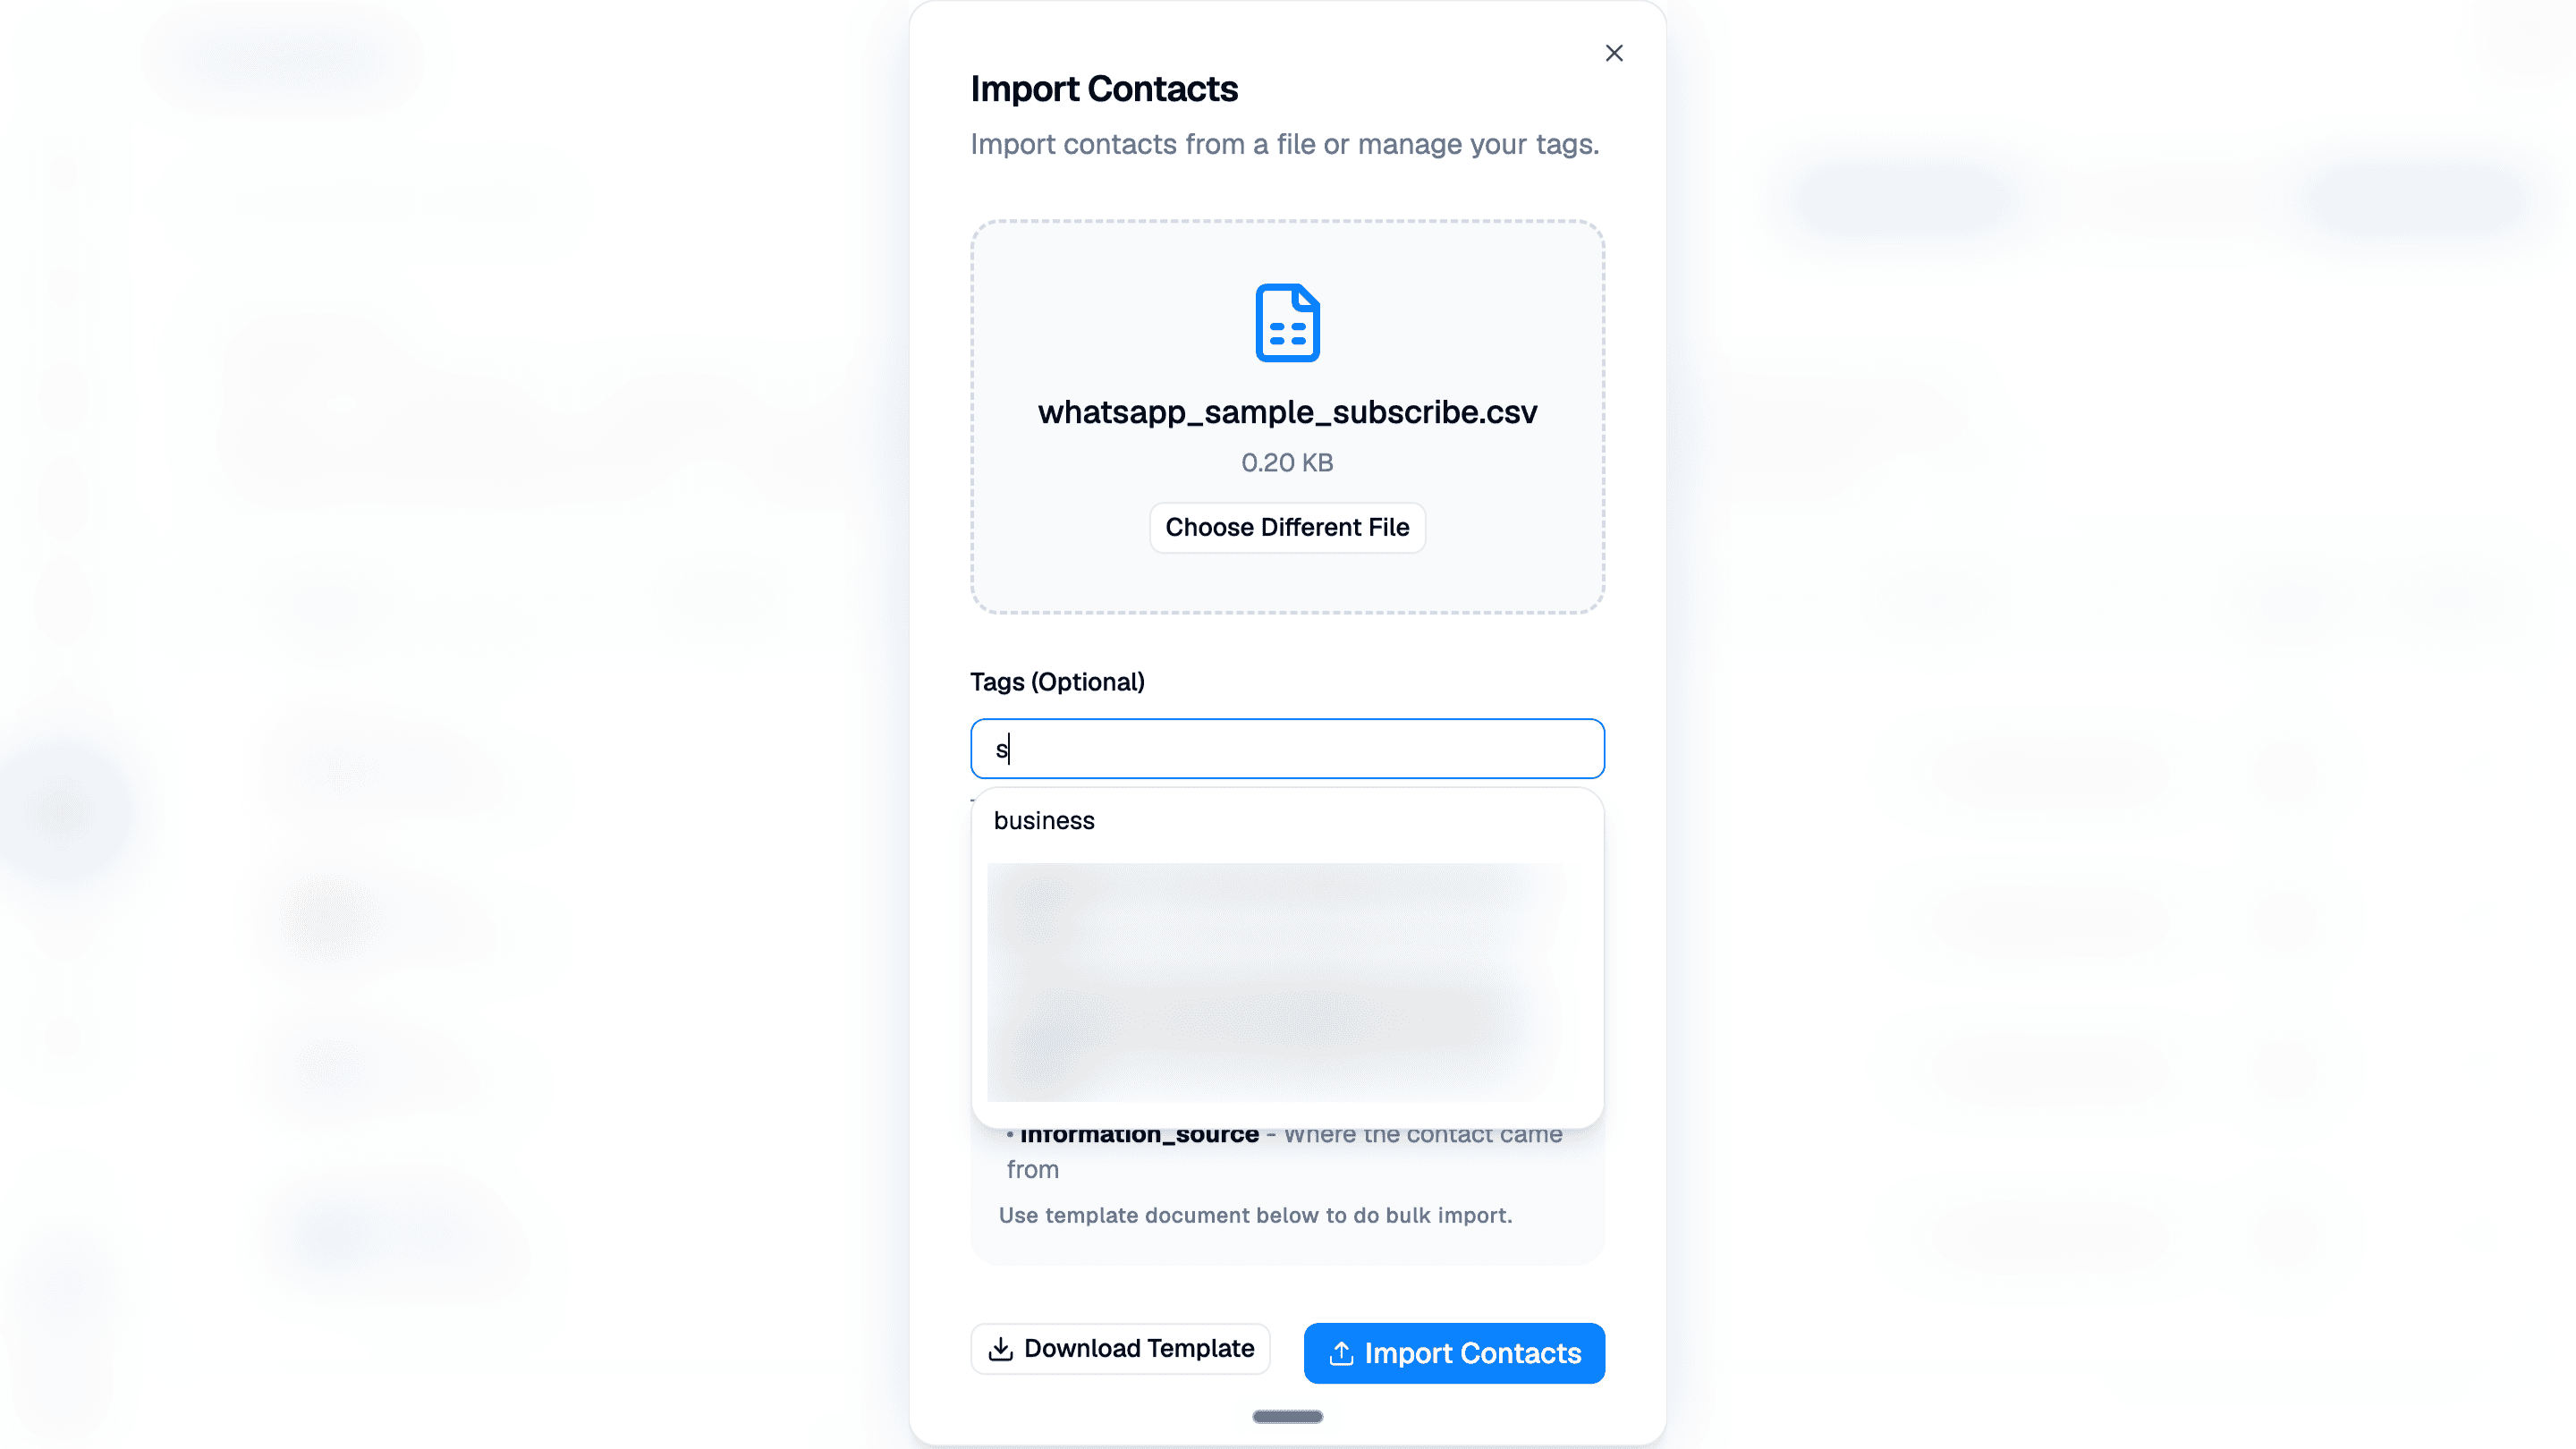
- Once the file is attached, use Tags (Optional) to search for and select a tag to assign to the imported contacts. Leave it empty if no tag is needed. Use Choose Different File to replace the attachment.
- Click Import Contacts when the file and optional tag are ready.
Phone format
Include the country code (e.g. +2348012345678). We'll skip rows we
can't parse.
Custom fields: store anything extra
Built-in fields cover the basics (name, email, phone). For details such as a booking ID, plan tier, birthday, or preferred language, create a custom field.
Go to Audiences → Contacts → Custom Fields and click Add Field. Give it a name and a type (text, number, date, Boolean, or enum/dropdown). See Custom Fields for creation and management steps. Once it exists, you can:
- Fill it in when you add or edit a contact
- Map a CSV column to it during import
- Use it as a variable in your templates and campaigns
- Filter segments by it
What's next
- Now that you have an audience, build the message → Templates
- Ready to send? → Campaigns
- See how it all fits together → Audience Flow reference sheet