
 Intelli Docs
Add a Website Widget
Create and manage chat widgets, preview them live, and deploy them to HTML, WordPress, or React websites.
The widget is a chat bubble that sits in the corner of your website. Visitors click it, talk to your AI assistant, and you can jump in to reply yourself any time.
Open Dashboard → Widgets to access Website Widgets. Use the Create Widget tab to build a widget and My Widgets to manage or deploy existing ones. The Create button on Channels → Website Widget also takes you to the builder.
Before you start
You need:
- An assistant already set up (the widget needs a brain).
- Access to your website's code; somewhere you can paste a snippet or add a component.
Create a widget
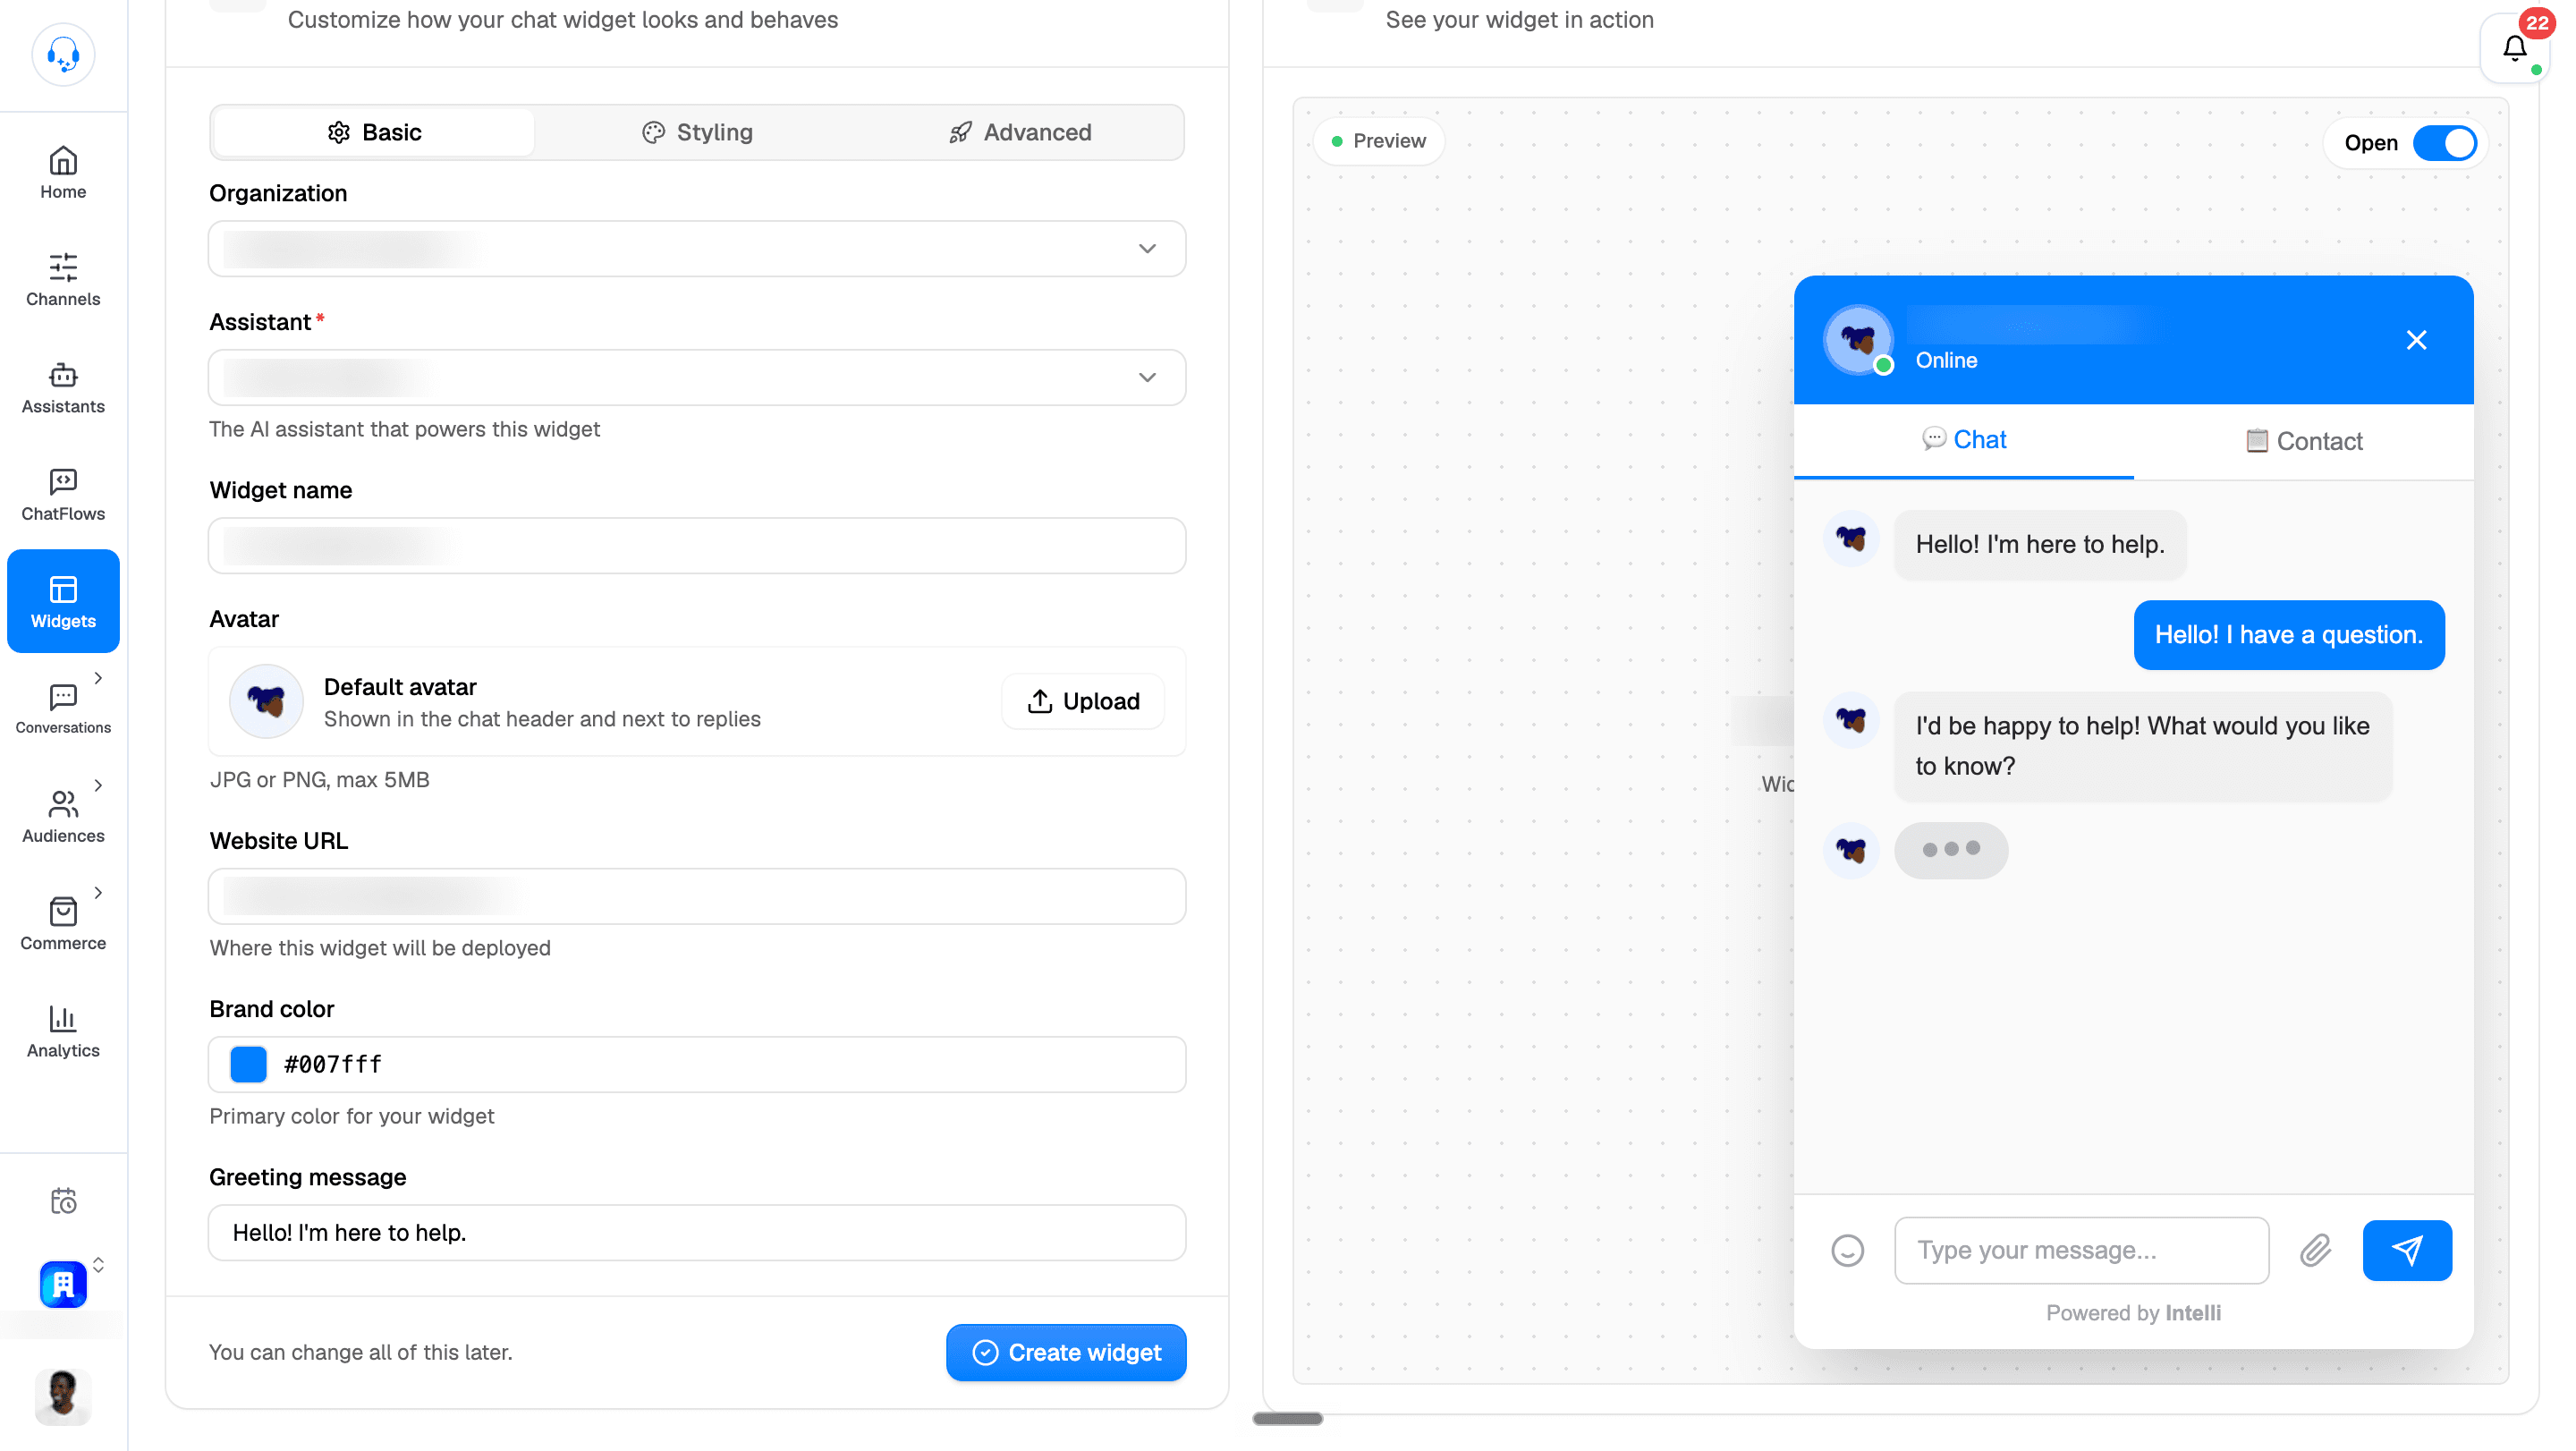
- Go to Dashboard → Widgets and select Create Widget to open the Widget configuration form.
- On the Basic tab, fill in:
- Organization: the organization this widget belongs to.
- Assistant: the AI assistant that powers this widget.
- Widget name: e.g. "Website assistant".
- Avatar: JPG or PNG, max 5MB, shown in the widget header.
- Website URL: where this widget will be deployed (e.g.
https://yourcompany.com). - Brand color: match your site (default is Intelli blue
#007fff). - Greeting message: the first thing visitors see (e.g. "Hello! I'm here to help.").
- Optionally open the Styling tab (position, size, header and message colors, font, help text, button text, window dimensions, animation) and the Advanced tab (sound notifications, the "Powered by Intelli" credit, and optional help/knowledge-base and tickets tabs inside the widget).
- Watch the Live preview card on the right update as you go. Switch between Preview, Demo, and Live test modes.
- Click Create widget.
Deploy it to your site
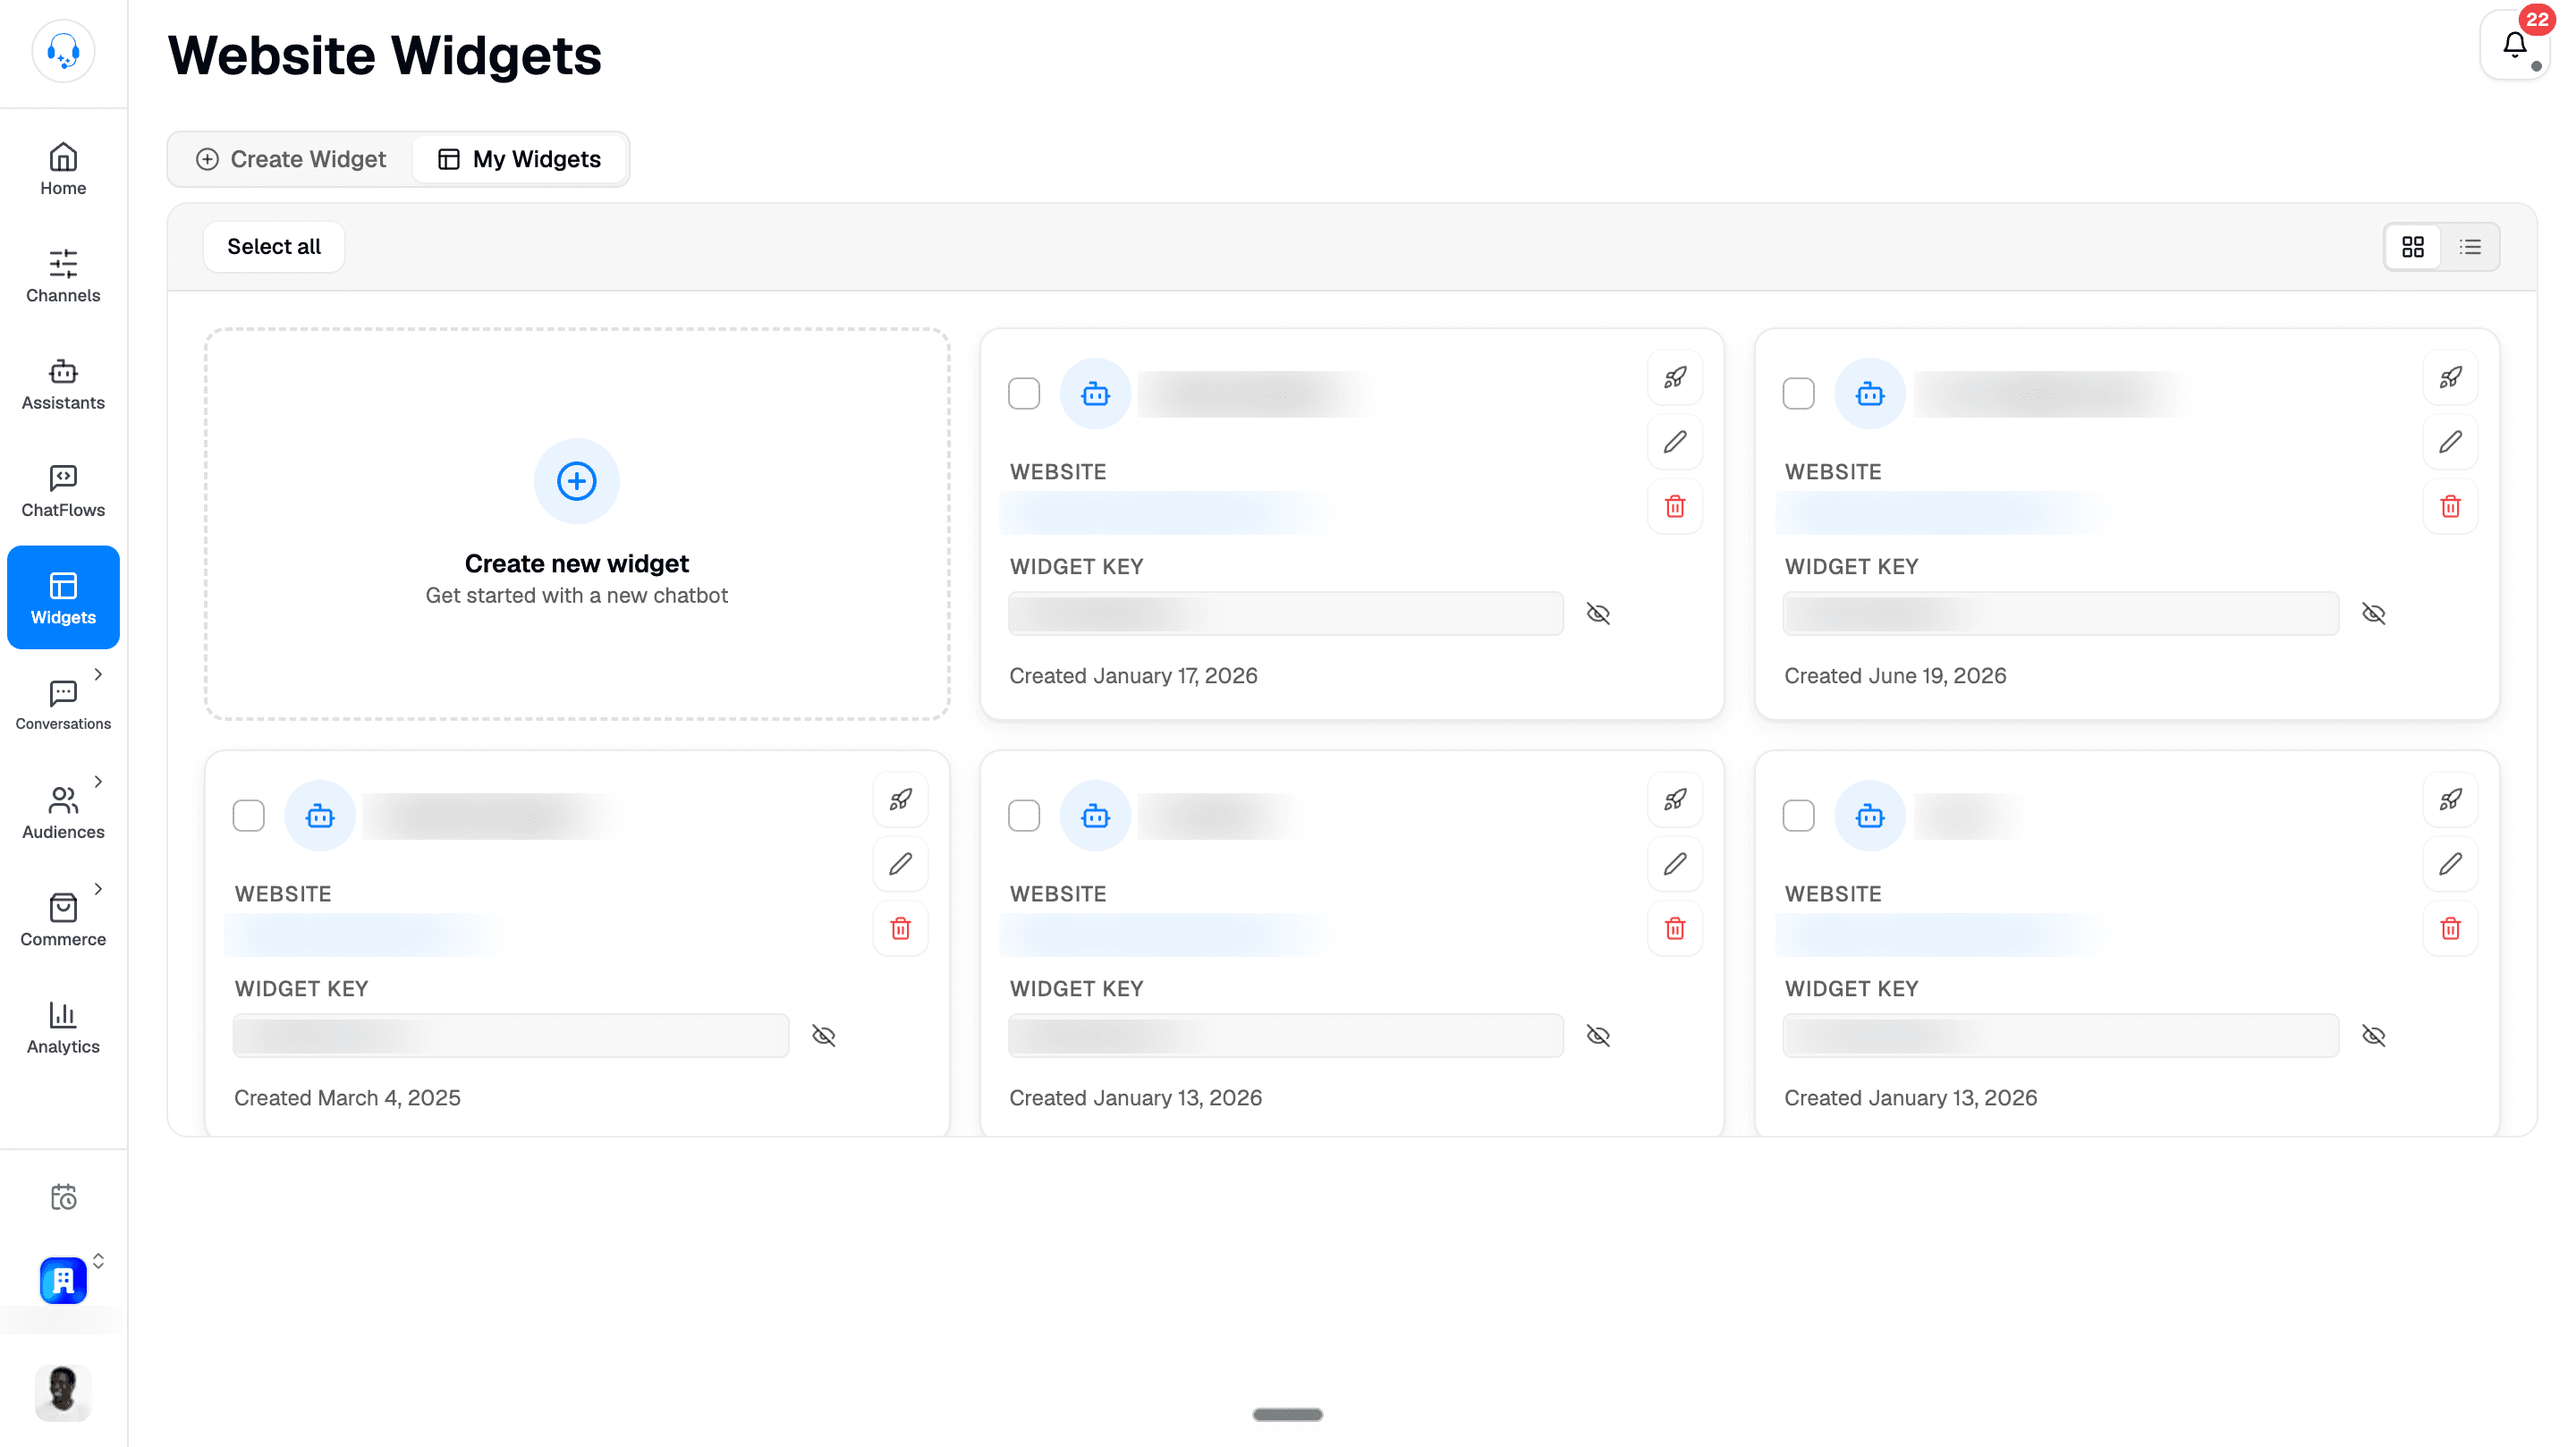
After creating, open the My Widgets tab (or Dashboard → Widgets) and click the widget's rocket icon (Deploy widget).
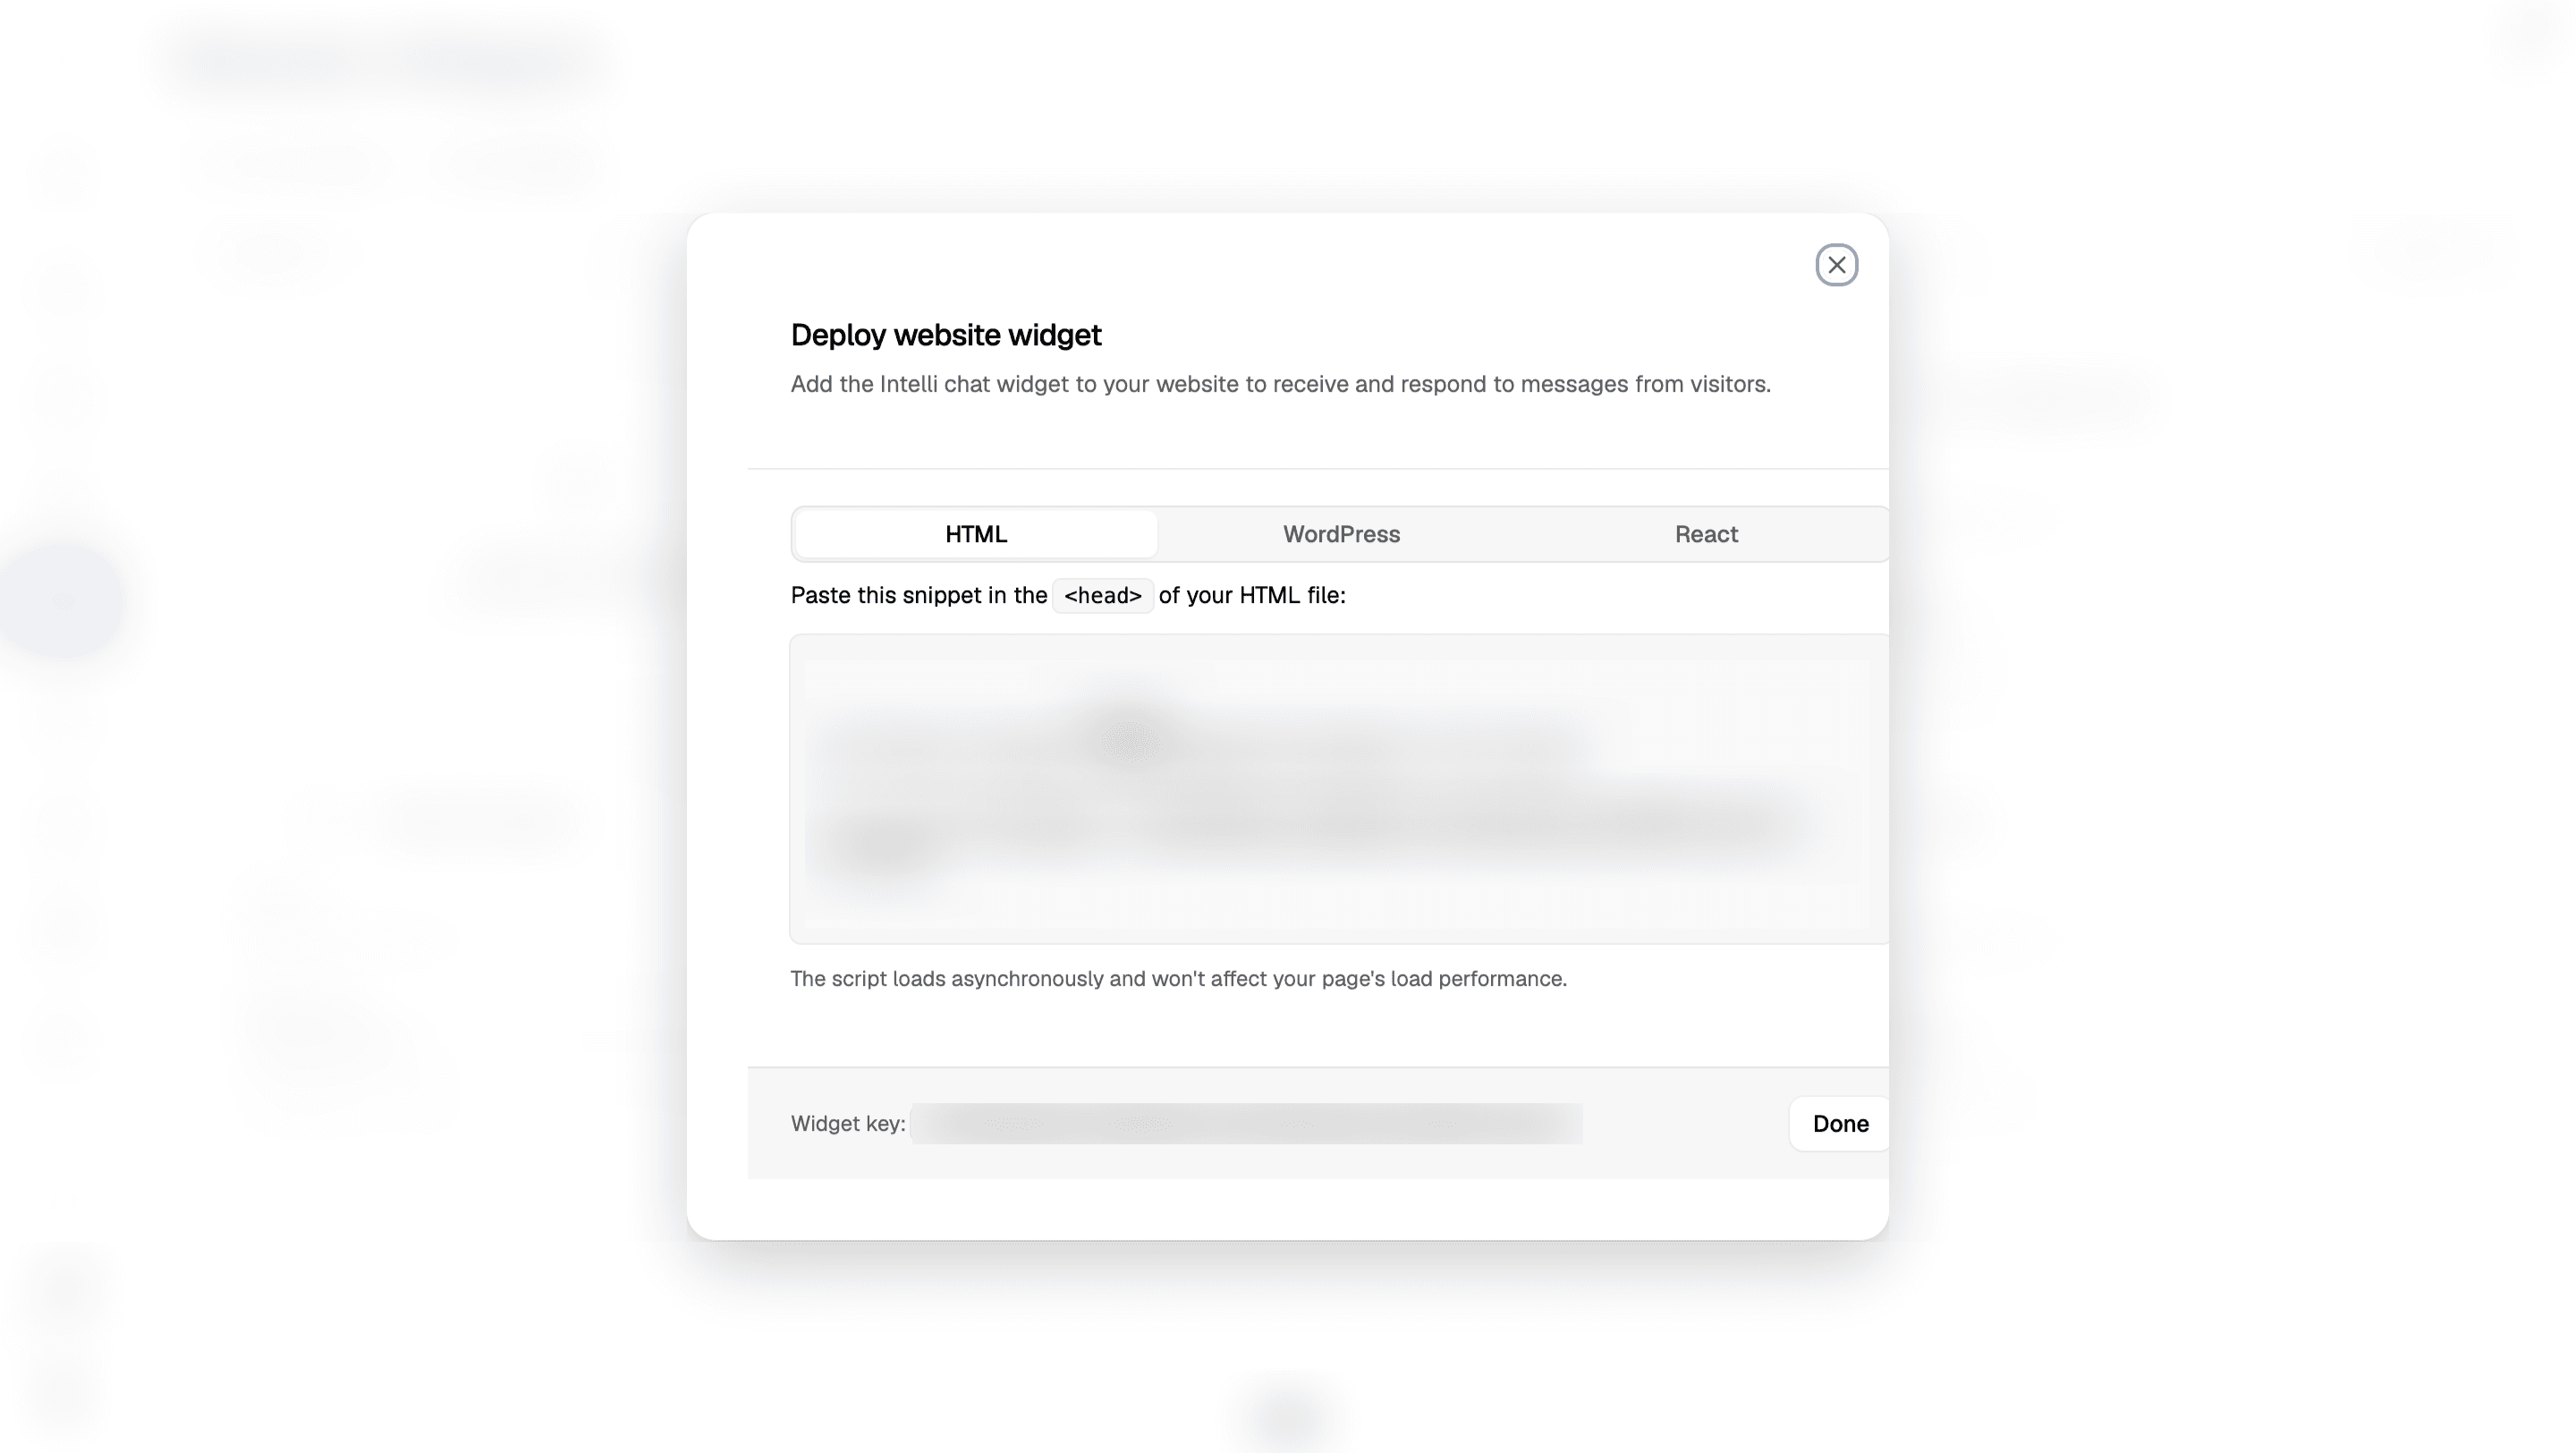
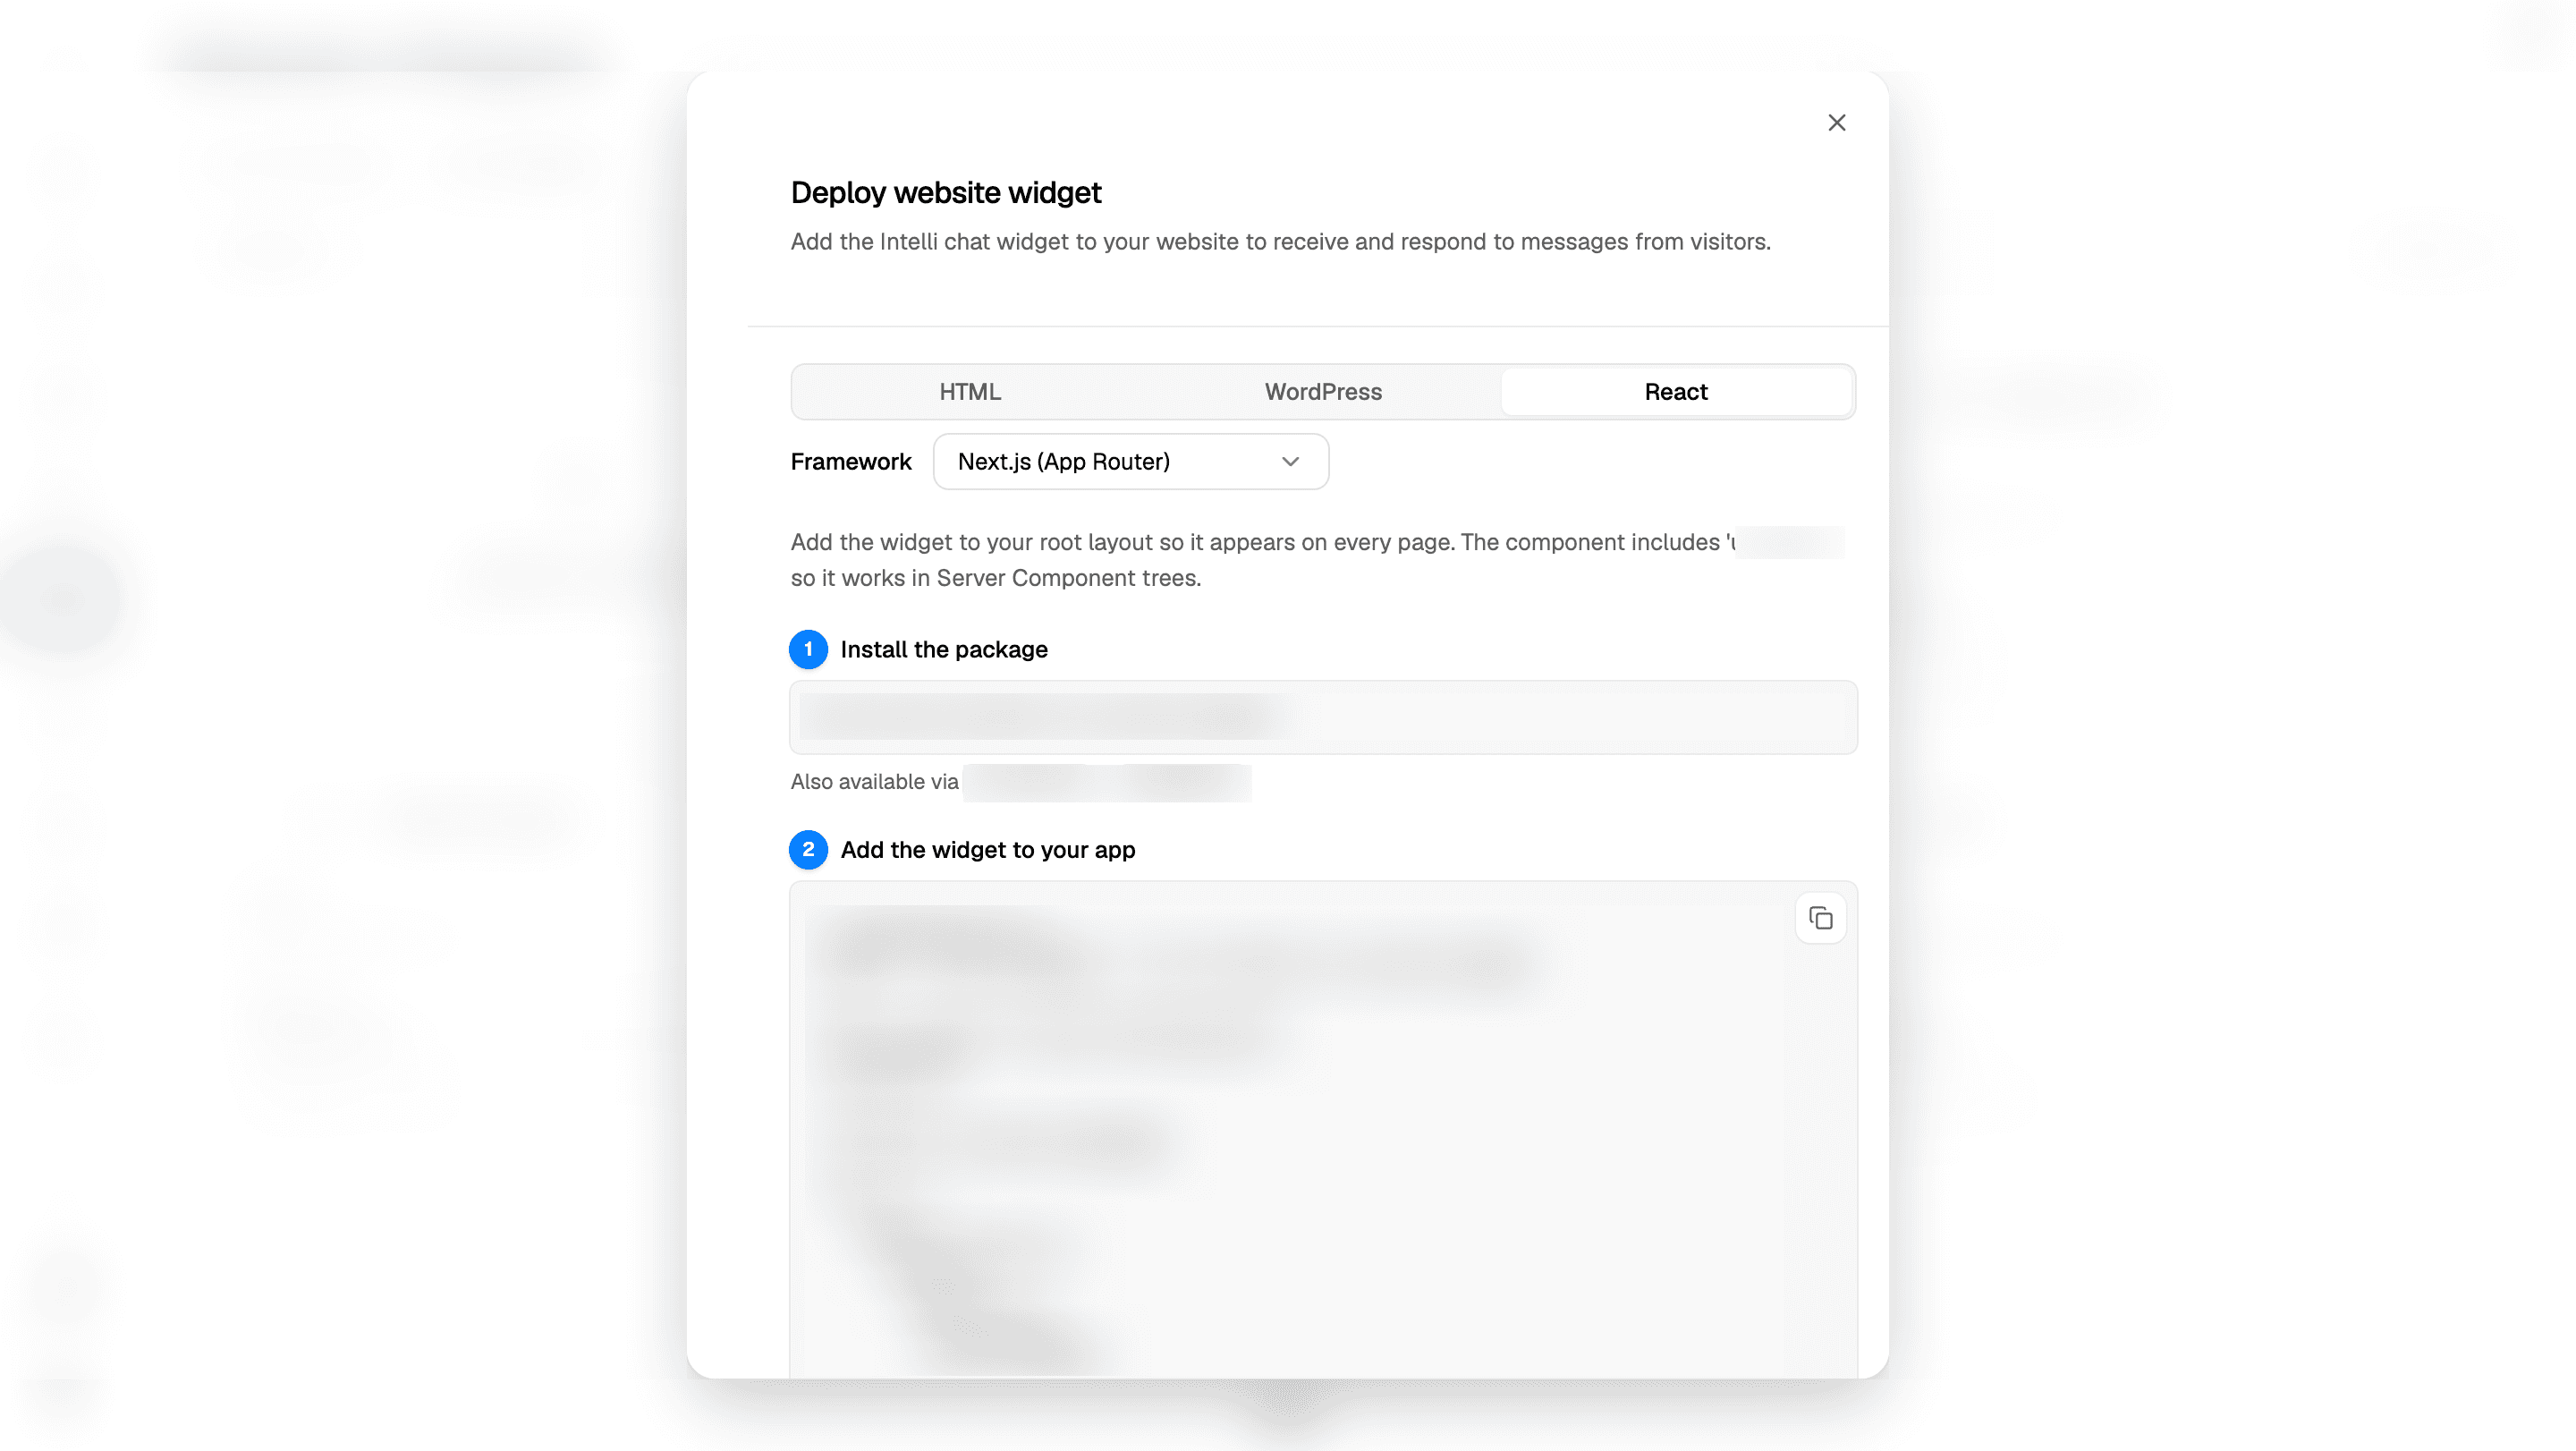
The Deploy website widget dialog gives you three options:
HTML
Select HTML, copy the snippet, and paste it into the <head> of your HTML.
The script loads asynchronously and won't affect page load performance.
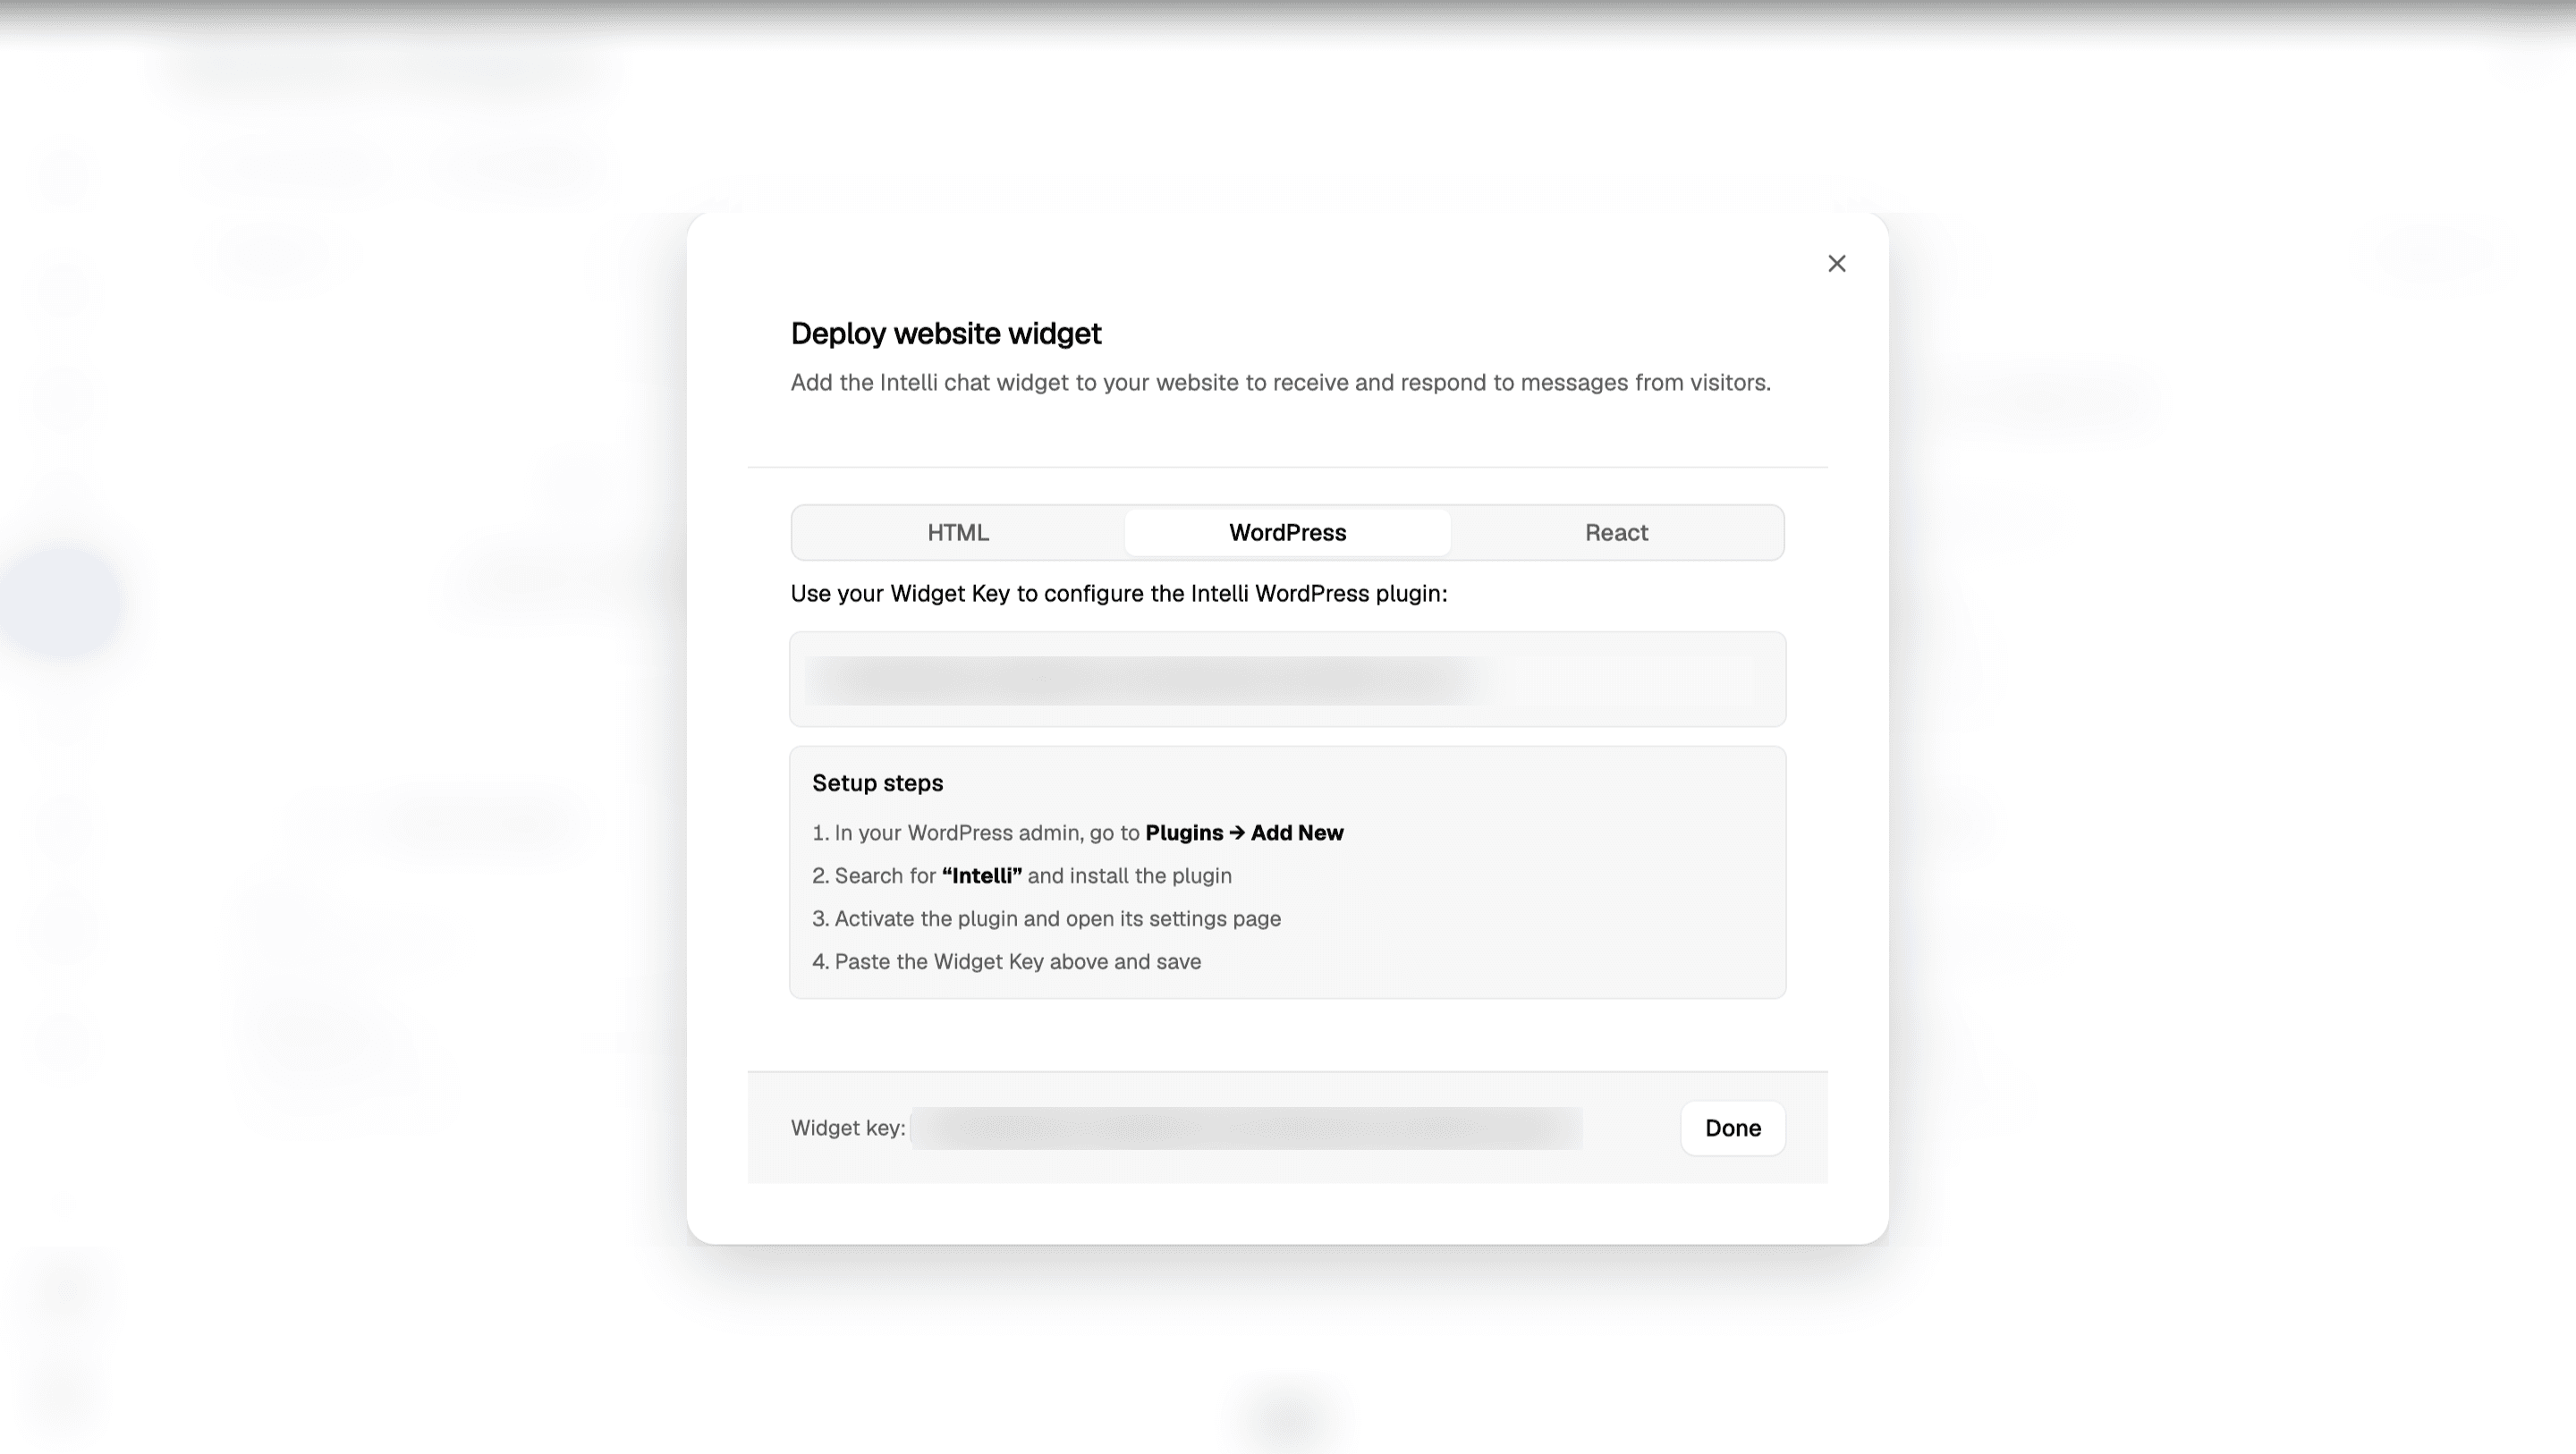
WordPress
Select WordPress to find your Widget Key and the setup instructions. In your WordPress admin, go to Plugins → Add New, search for Intelli, and install and activate the plugin. Open its settings, paste the Widget Key from the dialog, and save.
React
Select React, then choose your Framework. Follow Install the package
and Add the widget to your app to add the IntelliWidget component from
@intelli-inc/chat-widget to your root layout or App component. The dialog
shows ready-made snippets for Next.js (App and Pages router), Vite, and
Create React App; the capture below shows Next.js (App Router) selected.
Refresh your site; the chat bubble should appear.
Test it
- Open your site in an incognito window.
- Click the bubble. The greeting should appear.
- Send a test question. The AI should reply within a few seconds.
- Go to Dashboard → Conversations → Website. The conversation should be there in real time.
Managing widgets later
From My Widgets (or Dashboard → Widgets), each widget has three actions:
- Deploy widget (rocket icon): reopen the deployment dialog to grab the snippet or Widget Key again.
- Edit widget (pencil icon): change the name, greeting, colors, assistant, and other settings. Changes take effect without re-installing the snippet.
- Delete widget (trash icon): remove the widget. You can also select several and delete them in bulk.
The My Widgets view above shows these controls together. Use the card checkboxes or Select all to select widgets.
Tips
- Match the greeting to the page. If you run campaigns to a landing page, use a greeting that mentions the offer.
- Keep the assistant prompt tight. Website visitors expect quick, on-topic answers. See Set Up Your Assistant.
- Pick a colour with contrast. Light blue on a light background is invisible.
What's next
- Reply to widget conversations → Manage Conversations
- Connect WhatsApp too → Connect to WhatsApp